The frustration of a faulty microphone is a familiar tale for many players. It’s an annoying problem to have, especially if you find out when you’re already in the middle of an intense Premier game. I’ll save you all the trouble by using these 6 fixes when your mic is not working in CS2.
Check Connections and Cables

The first fix might be an embarrassing one, but still one worth doing. There have been countless times when my mic has seemed to be malfunctioning, and I can’t appear to fix it, no matter what I try. As it turns out, the cable was just loose. So, save yourself some time and eliminate the simplest cause first.
For wired microphones, check that the audio jack or USB cable is connected properly. If it is, I highly suggest unplugging it and replugging it for good measure. For wireless headset users, see how much juice you have left. Sometimes, low battery levels can cause issues with microphones. It’s also worth checking if you haven’t accidentally turned on the mute button.
Check Your Audio Settings in CS2
The problem isn’t always hardware-related. Some CS2 settings can cause your mic to not work when they aren’t set correctly. But no worries, tweaking them is a breeze – just a couple of clicks, and your voice is back in the game, loud and clear.
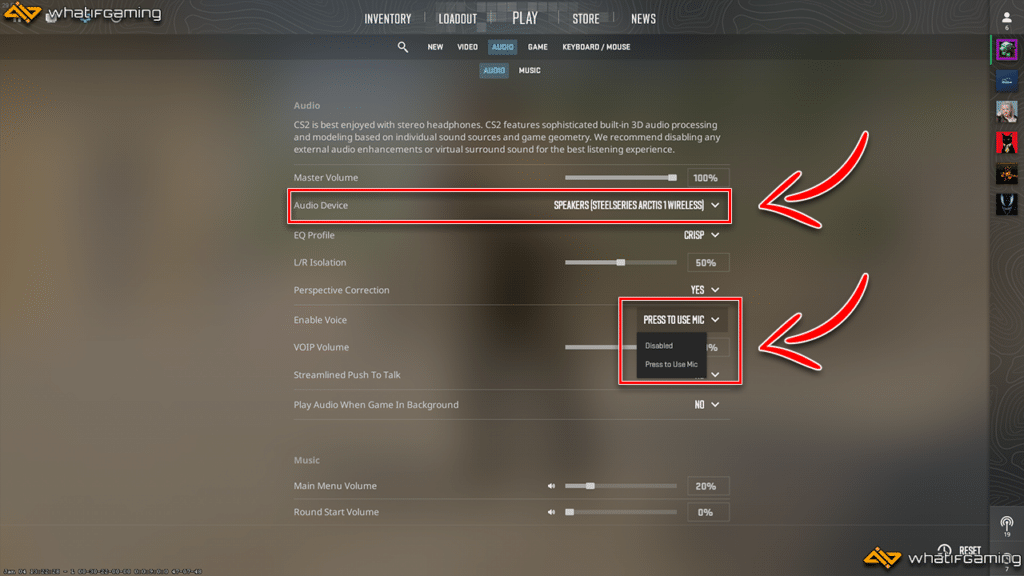
- Access the CS2 settings by clicking on the cog wheel icon.
- Head over to the Audio tab and look for the Audio Device option.
- Select the headphones that you are currently using.
- Next, go to the Enable Voice option and set it to Press to use mic.
- Switch to the Keyboard/Mouse tab and go to Communication Options.
- Under here, you should find the keybind for Use mic.
- Set it to whatever button you are most comfortable with.
- Exit the settings and press the button while talking to see if your mic is now working.
Adjust Your Steam Settings
Another potential solution that isn’t discussed often is tweaking your Steam settings. Your Steam settings can influence what devices CS2 can access, which can be the main culprit behind your faulty microphone. So, follow these steps to adjust your Steam voice settings.
- Open the Steam launcher and click on the Steam logo in the upper left corner of the screen.
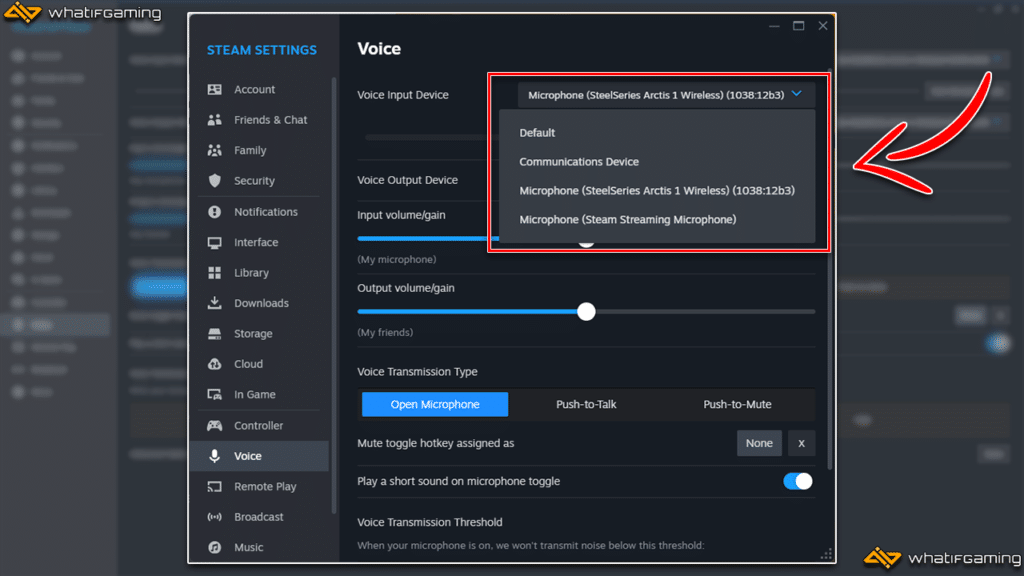
- Choose Settings from the drop-down menu and head over to Voice.
- Select the appropriate mic under Voice Input Device.
- Turn off the Voice Transmission Threshold since it can block your vocals, especially if you have a softer mic. Close the settings once done.
Ensure that No Other Apps Are Using Your Microphone
Closing background apps can not only help improve your FPS but can also fix issues when your mic is not working in CS2. Conflicting apps might be keeping your microphone busy without your knowledge, which is why CS2 can’t pick it up in game. I’d close any recording software, games, messaging apps, and even browsers to eliminate possible clashes.
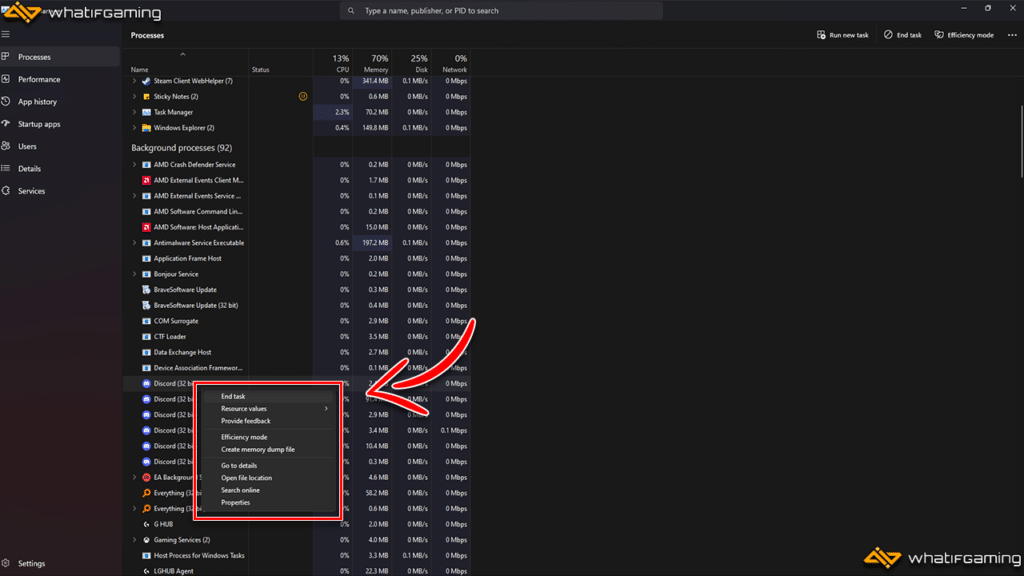
- Press ctrl + alt + delete simultaneously and select Task Manager.
- Under Processes, look for open apps and programs that you aren’t using.
- Right-click on each task and select End Task to close them.
Note: Don’t terminate any Windows Processes because they ensure your system runs smoothly.
Check Your Windows Sound Settings
If CS2 and Steam are both looking good, your problems might be coming from Windows itself. Windows has its own set of sound settings, which can affect what devices get access in-game. There are two main things you’d want to check here – the default input device and microphone volume.
- Click on the search bar, type in Settings, then press Enter.
- Go to the System and locate the Sound settings.

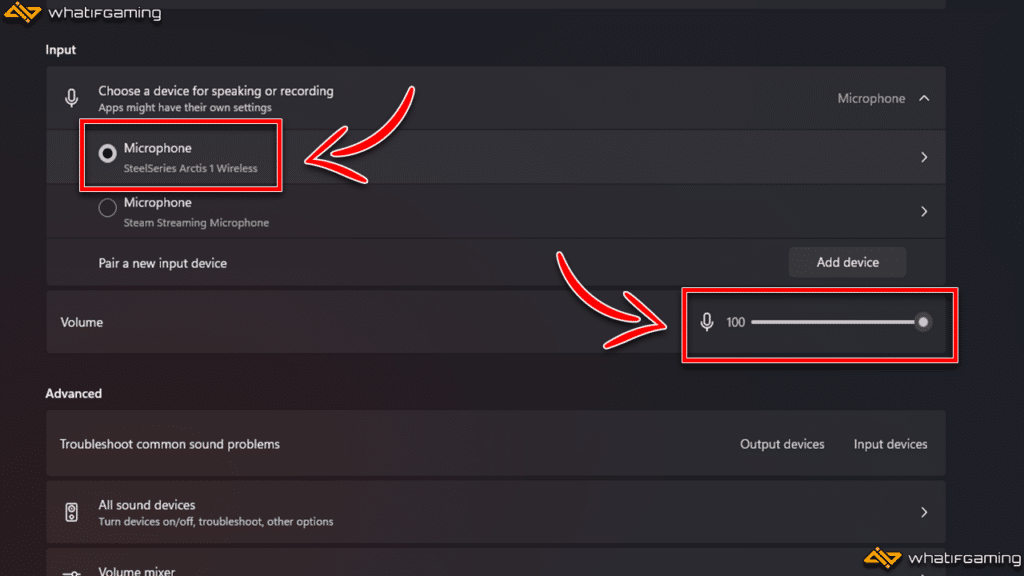
- Scroll down to Input and make sure that you’ve selected your preferred mic. Some devices can have built-in microphones, such as webcams or monitors, and might be the chosen default input device.
- Under Input, you should be able to find Volume. Set it to 100 if it isn’t already.
- Next, click on the arrow beside your selected microphone.
- In the General tab, make sure that the Audio option has a Don’t Allow button right next to it. If it says Allow, click on it to allow apps to use your mic.
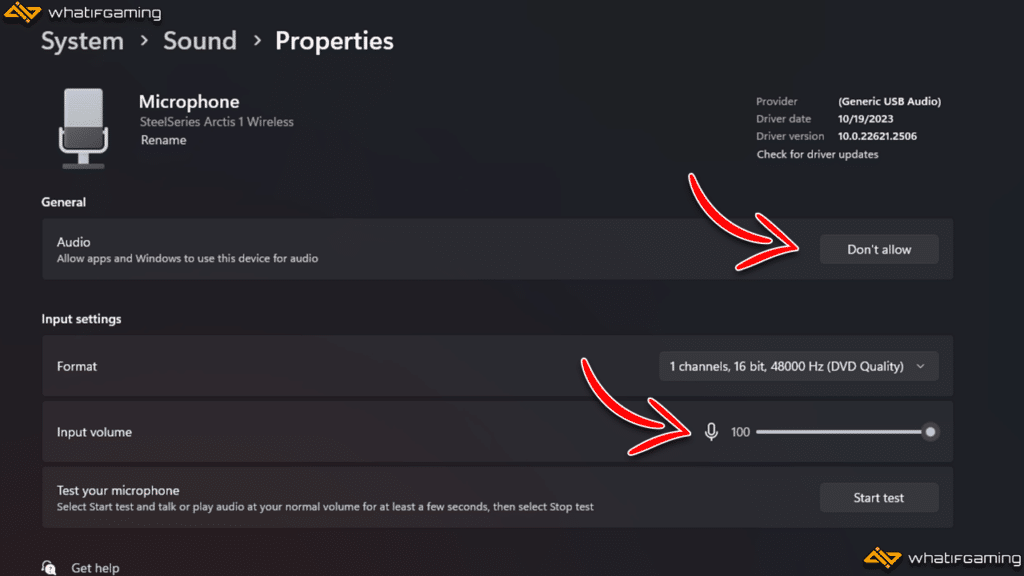
- Finally, check if the Input Volume is at 100, then exit.
Update Audio Drivers
Ruling out everything else, outdated audio drivers might be why your mic is not working in CS2. New updates might be available if you haven’t updated your drivers in a while – or at all, for that matter. Don’t worry. I often forget to update drivers as well. You know what they say, “if it ain’t broke, don’t fix it.”
- Search for Device Manager using the Windows search bar and press Enter.
- Click on the drop-down arrow next to Audio Inputs and Outputs.
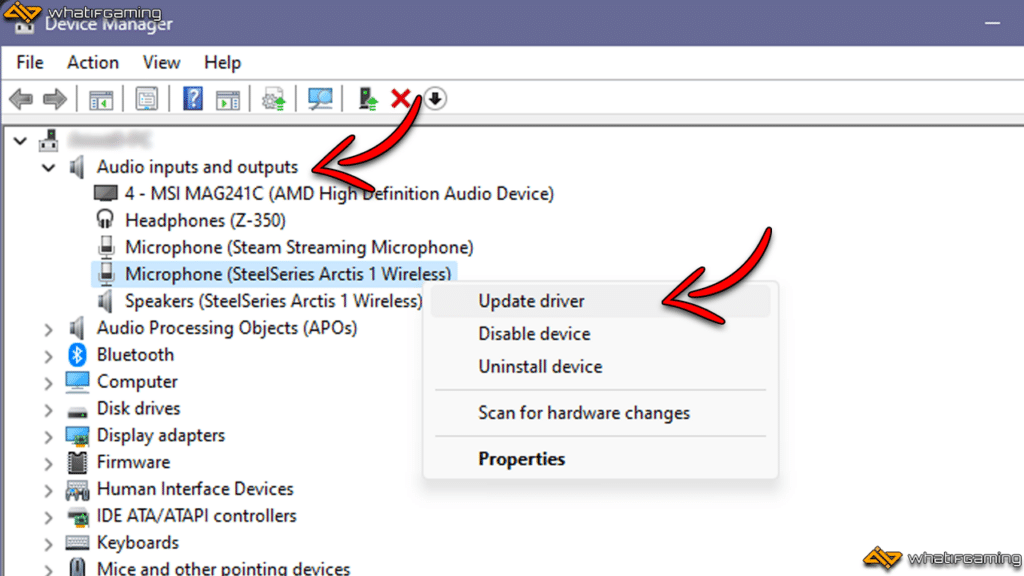
- Look for the microphone you’re using in CS2 and right-click on it.
- Select Update Driver, then Search automatically for drivers.
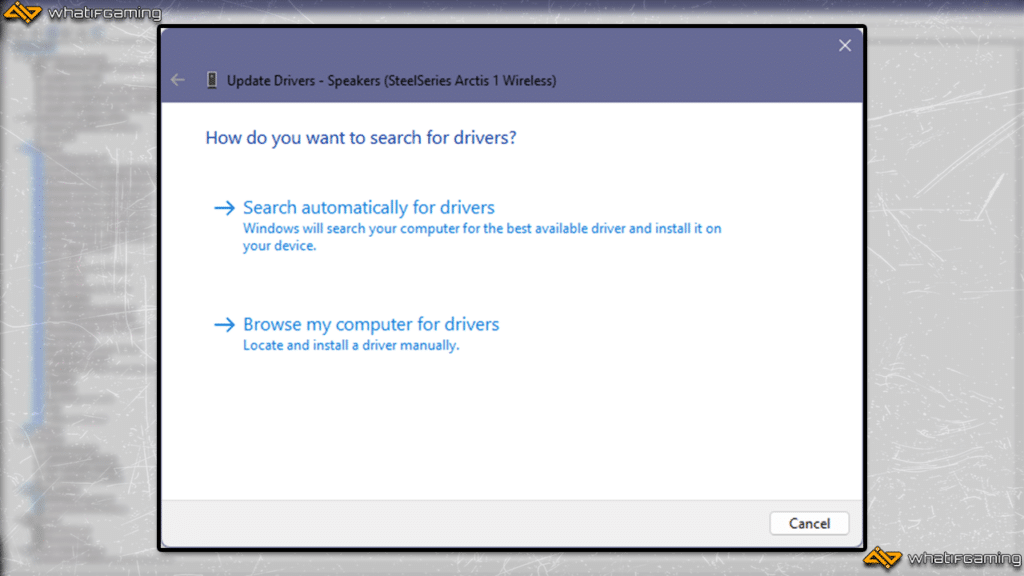
- Once the search is done, install any new drivers found and restart your PC.
Conclusion
Alright, that was my guide on how to fix your mic when it is not working in CS2. Hopefully, your pesky microphone issues have gone away, just like my CS Rating in Premier.