Call of Duty: Modern Warfare 3 is out now on PC through Steam and Battle.net. Like previous Call of Duty releases, there are a wealth of options to customize to fine-tune your experience and improve performance. However, some users are running into stability issues, which isn’t uncommon for COD releases. Here are a few things you can try to address the Call of Duty Modern Warfare 3 crash at launch issues.
Verify Game Files
The first thing you want to do is make sure your game files are in order. Call of Duty’s installation size is massive, and there’s a chance for something to go wrong during the download or installation process.
Steam
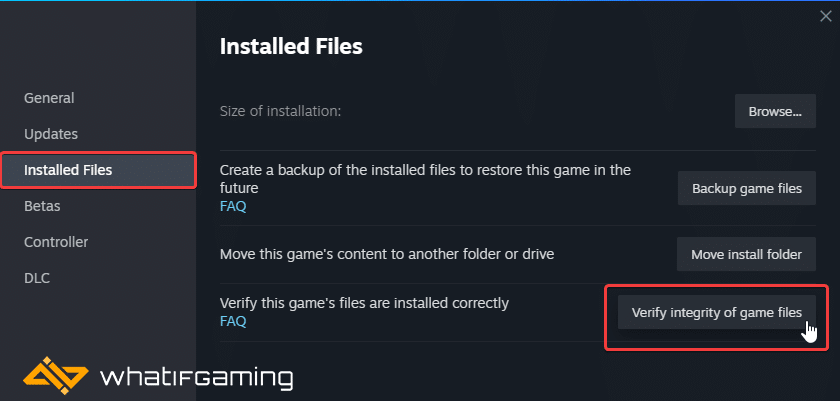
- Open Steam and navigate to your library
- Right-click on Call of Duty in your library
- Click Properties

- Select the Installed Files tab
- Click on Verify Integrity of game files

Steam will initiate a scan, and if anything is missing, Steam will redownload and install those files.
Battle.net
You can also scan and repair the files on the Battle.net client by following the steps below.
- Open the Battle.net desktop app
- Click on the Call of Duty icon in your Games tab
- Click the cogwheel next to the Play button and select Scan and Repair

Update GPU Drivers
It’s important to update your GPU drivers to the latest version to ensure your GPU is being properly used. This has been the case for previous Call of Duty releases as well, and it isn’t different this time around.

You can get the latest ones from the links below.
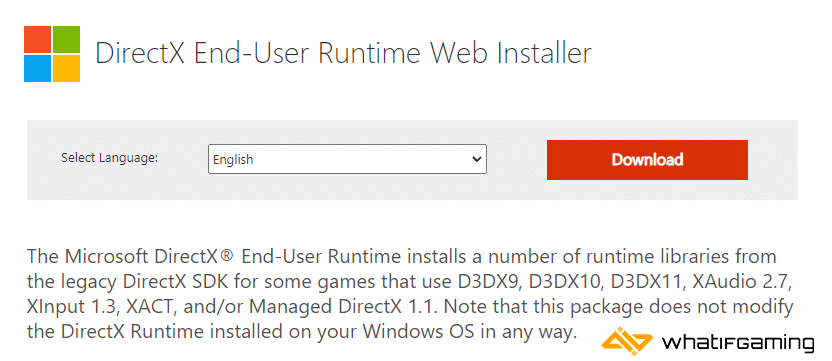
Update DirectX and Visual C++ Redistributables
Ensure that both DirectX and Visual C++ Redistributables are on the latest version.

Update Windows
Windows 7 and 8 are not supported by Call of Duty Modern Warfare 3, and the developers also recommend that you have the latest version of Windows 10 as well.
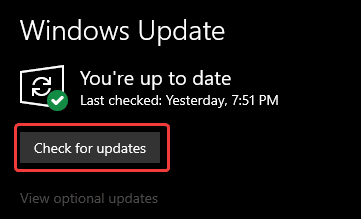
- In Windows Search type “Update”, and click on Check for Updates
- This will take you to the Windows Update section, and you can make sure you are on the latest version

Switch to Dedicated GPU (Laptop Users)
Ensure that your dedicated GPU is being utilized instead of the integrated one.
Switching to the dedicated Nvidia GPU
- First, open the Nvidia Control Panel
- Then navigate to 3D Settings and then Manage 3D Settings
- Open the tab Program Settings and choose Call of Duty from the dropdown menu
- Next, select the preferred graphics processor for this program from the second dropdown.
- Your Nvidia GPU should show as a High-performance Nvidia processor
- Save the changes
Switching to the dedicated AMD GPU
- First, open Radeon Settings
- Then navigate to Preferences, followed by Additional Settings
- Here, select Power and then Switchable Graphics Application Settings
- Select Call of Duty from the list of applications
- If Call of Duty isn’t on the list, click the Add Application button and select the executable from the installation directory. This adds the game to the list, and you’ll be able to select it afterward.
- In Graphics Settings, assign the High-Performance profile to the game.
Check for Updates
You might want to check for any updates as well. This can be done for both clients.
Steam
- Open Steam, and navigate to your library.
- Right-click on Call of Duty in your library
- Click Properties
- Select the Updates tab, and set Automatic Updates to High Priority
You might want to restart Steam just in case, as sometimes new updates show up that way. The high-priority setting will ensure that COD is updated first.
Battle.net
- Open the Battle.net desktop app
- Click on the Call of Duty icon in your Games tab
- Click the cogwheel next to the Play button and select Check for Updates
This will force Battle.net to check for any updates.
We hope this guide helped fix the Call of Duty Modern Warfare 3 crash at launch issue. Let us know if you have any questions in the comments below.


