Do you want to optimize your settings in Overwatch 2? Here are the best Overwatch 2 settings that you can use.
Overwatch 2 offers a variety of different settings that you can change. There are individual Overwatch 2 settings for video, audio, gameplay, controls, social, and accessibility. These allow you to customize your gaming experience and will enable you to feel more comfortable in the game.
It’s important to tinker with the different Overwatch 2 settings because they can give you a competitive advantage. Changing the different options can increase your FPS, allow you to use a higher refresh rate, get rid of crashes, and improve visuals, among many others.
Tons of advantages come with changing your Overwatch 2 settings to match the capabilities of your device. We’ve created this guide to help you optimize your Overwatch 2 settings and find the perfect ones for you.
Here are the best Overwatch 2 settings that you can use.
The Best Overwatch 2 Settings
The different sections are divided according to how they are grouped in the game. Each section is split up based on how the various settings affect the game. Feel free to jump to the part you are looking for.
Video
These Overwatch 2 settings are related to the video and graphics within the game. Changing these can help you increase FPS in exchange for lower-quality visuals. You can also choose where the display outputs, the refresh rate, and fullscreen options here.
Video
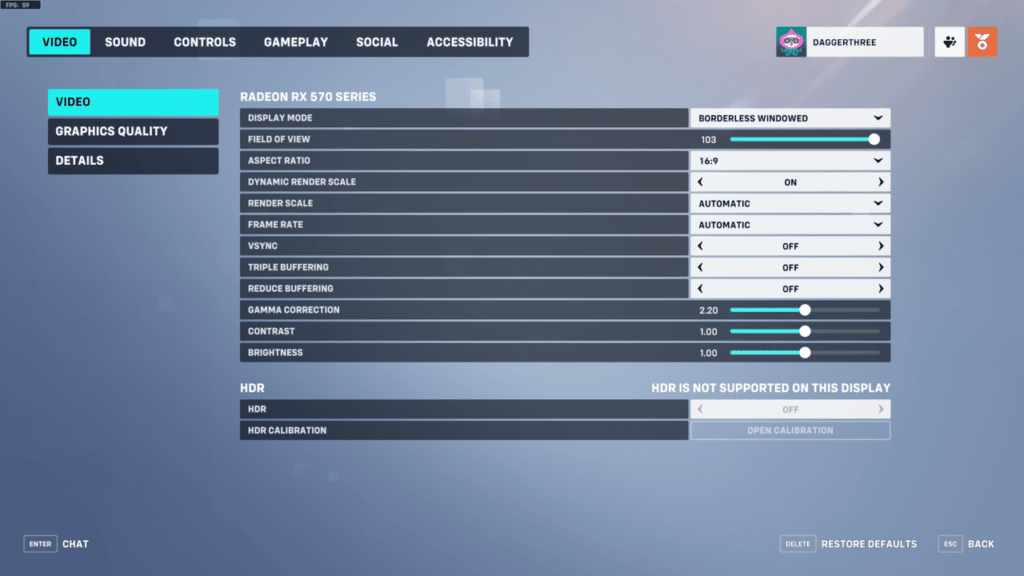
The first option is the Video tab. This contains some general graphics settings that affect the maximum frame rate, render scales, display mode, FOV, aspect ratio, and brightness, among other options.
| Display Mode | Fullscreen |
| Field of View | 103 (max) |
| Aspect Ratio | 16:9 or 21:9 for ultrawides |
| Dynamic Render Scale | Off |
| Render Scale | Automatic |
| Frame Rate | Custom |
| Maximum Frame Rate | 100 – 300 |
| Vsync | Off |
| Triple Buffering | Off |
| Reduce Buffering | Off |
| Gamma Correction | 2.20 |
| Contrast | 1.00 |
| Brightness | 1.00 |
We recommend using Fullscreen as the primary display mode and a 103 FOV to maximize the things you see on your screen. This gives you a great overall view of the things happening within the game.
Turn the dynamic render scale “Off” and set the render scale to “Automatic.” The dynamic render scale automatically changes the resolution at which your game is rendered to ensure that you always hit the FPS you set, even during intensive scenarios. Unfortunately, this can blur the visuals on your screen, which is why you should turn it off.
The general consensus within the gaming community is turning Vsync off for most games. It can hinder your frame rate by forcing it to wait, which can cause screen tearing or lag. However, it can help in some situations, especially if you have a lower-end machine.
Turning off triple buffering is recommended since it can increase input lag. The reduce buffering option depends on your situation. If your FPS is higher than your monitor’s refresh rate then it’s best if you turn this on. However, if your in-game FPS is lower than your monitor’s refresh rate, then it’s best if you turn this off.
There’s also a separate section dedicated to HDR settings for HDR-capable monitors. Make sure to turn HDR to “On” if your monitor supports it.
Graphics Quality

Next up is the graphics quality section. Here you can change how your game looks through textures, effects, lighting, and antialiasing. If you’re simply looking to get the highest possible FPS and performance, then choosing the “low” preset will work the best.
However, the low preset definitely isn’t for everyone. Even though Overwatch 2 looks fine with the graphics turned to their lowest, some players prefer better visuals for a solid gameplay experience.
Here are our recommended settings if you’re looking to find a good mix between performance and graphics quality.
| Graphics Quality | Medium |
| High Quality Upsampling | Default |
| Texture Quality | High |
| Texture Filtering Quality | High – 4X |
| Local Fog Detail | Low |
| Dynamic Reflections | Off |
| Shadow Detail | Medium |
| Model Detail | Ultra |
| Effects Detail | High |
| Lighting Quality | Ultra |
| Antialias Quality | Low – FXAA |
| Refraction Quality | High |
| Screenshot Quality | 1X Resolution |
| Ambient Occlusion | Low |
| Local Reflections | On |
| Damage FX | Default |
These Overwatch 2 settings will make your game look better while not sacrificing much performance. Depending on the power of your PC, you can probably turn a few settings a bit higher without getting FPS drops or stutters.
I recommend increasing the texture filtering quality and the antialias quality if you have a relatively powerful PC and want better-quality graphics.
You can turn texture quality to medium or low, texture filtering quality to low, antialias quality to off, and effects detail to low if you’re still experiencing FPS drops. Otherwise, just choose the low preset and see if any FPS drops, stutters, or lagging occurs.
Details
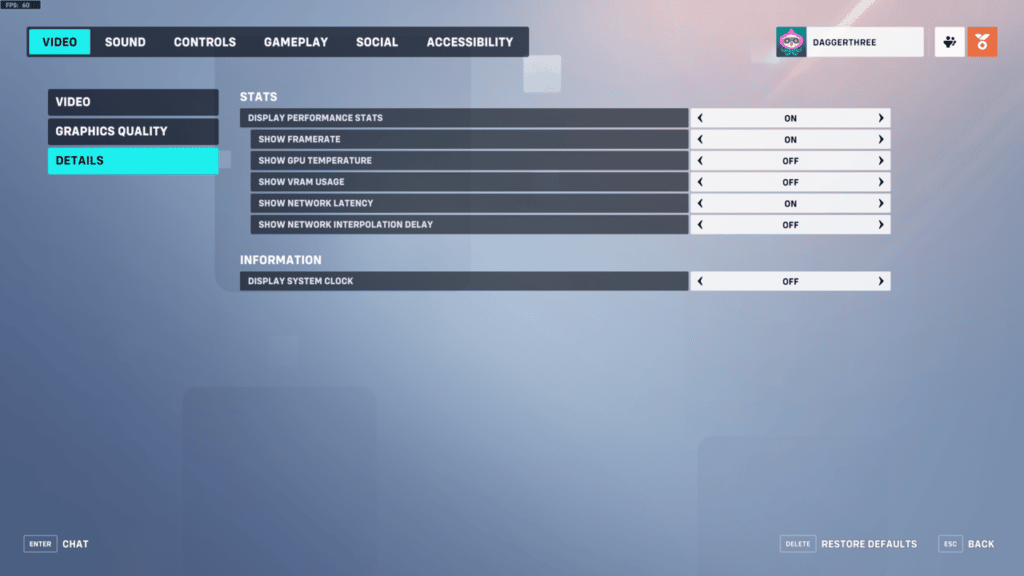
The final section under Video is the details tab. This includes options for displaying performance stats and other information. Most of the Overwatch 2 settings here are mainly used to monitor performance and can be left up to personal preference whether you’d like to see them or not.
| Display Performance Stats | On |
| Show Framerate | On |
| Show GPU Temperature | Off |
| Show VRAM Usage | Off |
| Show Network Latency | On |
| Show Network Interpolation Delay | Off |
| Display System Clock | Off |
The important performance stats here that I recommend you turn on is the framerate and network latency. This shows your FPS and ping in-game in the upper left corner of your screen. You can also turn on the system clock if you want to keep track of the time. We all know how fast time can fly when playing Overwatch 2.
Best Graphics Card Settings for Overwatch 2
Sometimes, aside from optimizing your in-game Overwatch 2 settings, you must also change the settings from your graphics drivers. Finding the best settings for your GPU can help you squeeze out the best performance from your graphics card.
Best NVIDIA Control Panel Settings for Overwatch 2
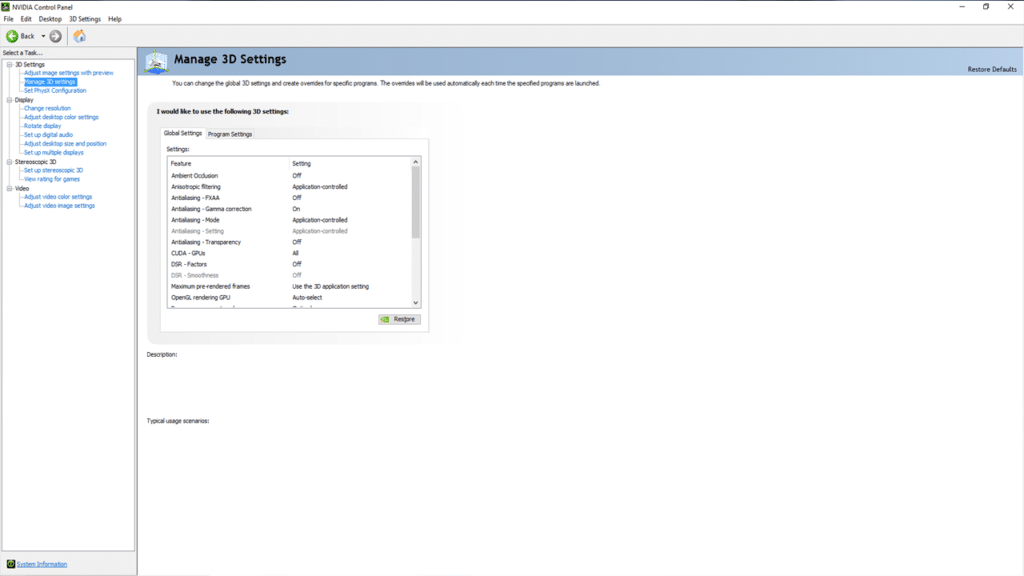
These first set of Overwatch 2 settings are for those who have an NVIDIA GPU. The most recent NVIDIA gaming GPUs have “GTX” or “RTX” within their name. The first thing you have to do is to make sure that your GPU drivers are updated.
You can download the latest drivers for your GPU directly from the NVIDIA website. Just input your GPU model within the drop-down options found on the site, and get the latest available one.
Here are the recommended settings that you should change within the NVIDIA Control Panel:
| FEATURE | SETTING |
| CUDA – GPUs | All |
| Low Latency Mode | Ultra |
| Power Management Mode | Prefer Max Performance |
| Monitor Technology | G-sync (if your monitor offers G-sync support) |
| Threaded Optimization | Auto |
| Triple Buffering | Off |
| Vsync (Vertical Sync) | Off |
| Resolution | Native monitor resolution |
| Refresh Rate | Max your monitor supports |
These settings can help you increase performance within Overwatch 2. The rest of the settings found within the NVIDIA Control Panel that we didn’t mention are for visuals and global settings. I recommend just changing things like antialiasing and texture filtering within the Overwatch 2 settings instead.
Make sure to use the highest refresh rate your monitor supports. Using a high refresh rate monitor can give you a huge competitive advantage, especially in a shooter game like Overwatch 2, where fast reaction time is important.
Low Latency Mode can also help increase your FPS and reduce input lag. This allows your game to feel smoother and more responsive to your clicks and button pushes.
Best AMD Adrenalin/ Radeon Settings for Overwatch 2
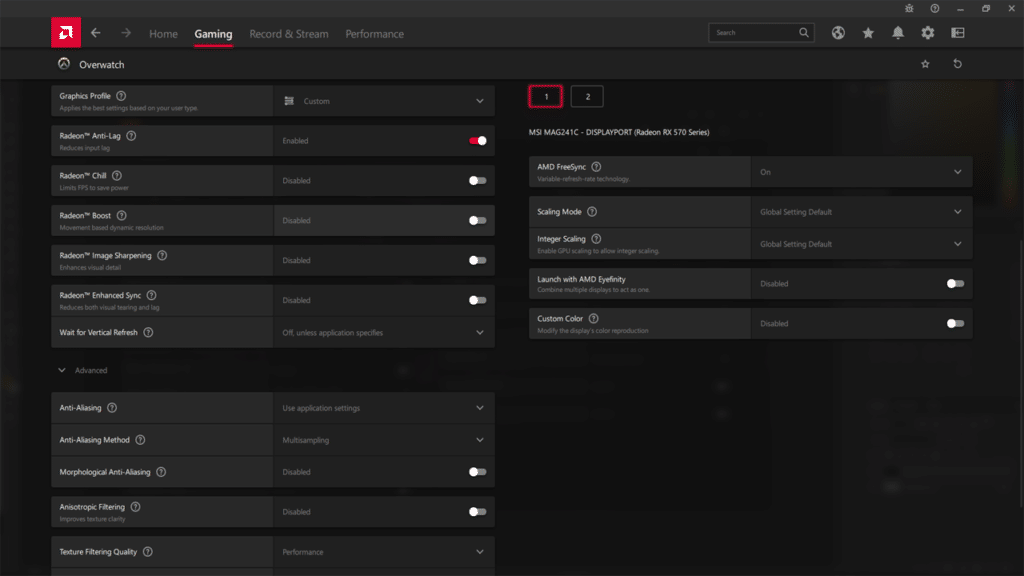
Of course, we can’t leave Team Red behind. AMD has recently made some pretty great graphics cards, giving NVIDIA a run for its money. So these settings are for AMD, Radeon, or Adrenalin users. The Adrenalin Software has a great UI and is very easy to manage.
Like always, it’s best to first check if you have the latest GPU drivers. If you already have the AMD Adrenalin Software installed, you can simply check for updates from the home tab. Otherwise, you’ll have to visit AMD’s driver website, input your current GPU and download the latest drivers/software from there.
The installation can take a relatively long time, depending on how fast your computer is. Don’t be scared if the screen flickers when installing. It’s all a part of the process. Once you got the latest drivers installed, follow our recommended AMD Adrenalin settings for Overwatch 2 below.
Here are the recommended settings that you should change within the AMD Adrenalin Software:
| FEATURE | SETTING |
| Radeon Anti-Lag | Enabled |
| AMD Radeon Chill | Disabled |
| Radeon Boost | Disabled |
| Image Sharpening | Disabled |
| Radeon Enhanced Sync | Disabled |
| Wait for Vertical Refresh | Always Off |
| AMD FreeSync | On (if your monitor supports it) |
Radeon Anti-Lag can be a helpful feature when your GPU is bottlenecking your game. It controls the CPU so that it doesn’t zoom past the performance of your GPU, which can result in faster response time.
You can also try experimenting with Radeon Enhanced Sync since it can sometimes help get a more stable gaming experience, especially on lower-end machines. However, it’s recommended to turn it off for the most part.
The other settings, like antialiasing, filtering, and buffering, are up to your personal preference. Although, we do recommend manually adjusting them in Overwatch 2 rather than from the AMD Adrenalin Software.
Sound

Under Sound, you can find a collection of settings that manipulate everything related to the game’s audio. This includes the menu audio, background music, voice comms, voice lines, sound effects, and the overall game volume.
General
| Master Volume | 100 |
| Sound Effects Volume | 100 |
| Music Volume | 100 |
| In-Game Voice Volume | 100 |
| Playback Device | Default |
| Spatial Audio | System Settings/ Dolby Atmos For Headphones |
| Audio Mix | Default |
| Sound Plays While in Background | On |
| Play Sound When Enemy Eliminated | On |
| Play Sound When Teammate Eliminated | On |
You want to keep all of your volume settings at their maximum values. There are a ton of sound effects and sound cues in Overwatch 2 that can help you gather information and plan your next move. The music volume is the only thing you can probably turn down here. It can get a bit loud and doesn’t really add much to the game.
Select “Default” as your playback device so that the audio automatically outputs to the device you are using. Spatial Audio will largely depend on personal preference. Make sure to experiment with this setting to find out the best option for your headphones. I personally have this set to system settings.
It’s recommended to turn on the “play sound when enemy eliminated” and the “play sound when teammate eliminated options.” These two settings can help you gather information about deaths or kills easier without having to look at the kill feed. The audio cues can be quite annoying at first, but you’ll get used to it in the long run.
Voice Chat
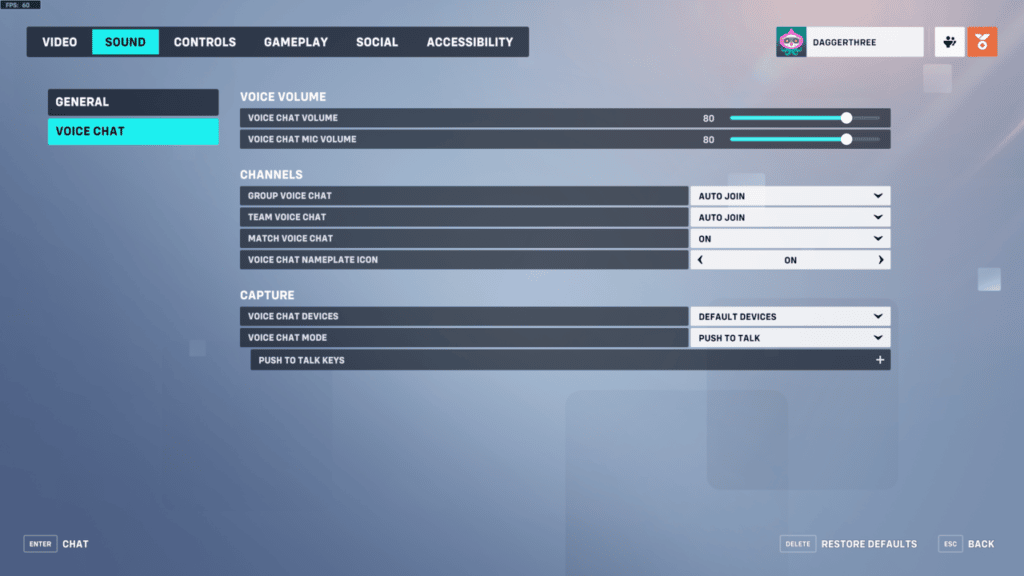
Most of the Voice Chat Settings in Overwatch 2 are up to personal preference. These relate to the options for team voice, group voice, and match voice.
| Voice Chat Volume | 100 |
| Voice Chat Mic Volume | 100 |
| Group Voice Chat | Auto Join |
| Team Voice Chat | Auto Join |
| Match Voice Chat | On |
| Voice Chat Nameplate Icons | On |
| Voice Chat Devices | Default Devices |
| Voice Chat Mode | Push to Talk |
| Push to Talk Keys | Z/B |
Voice comms are an important aspect in a game like Overwatch 2. This allows you to talk with your team about different strategies, relay important information quickly, and help promote teamwork to win the game. This is why I recommend voice chat volume and voice chat mic volume up to 100%. Unless you have a particularly loud headset or microphone.
The others are best left at their default settings unless you have specific reasons for not wanting to join the team/group’s voice chat. Match voice chat should be left to “on” and not “auto join” so that you don’t accidentally give out comms to the enemy.
Using push to talk is a great way to filter out what you want your team to hear while still being able to talk freely. Just make sure that your push-to-talk button is set to an easy-to-reach key so that you can use it quickly. I recommend using Z, B, T, or your mouse buttons, but feel free to choose otherwise.
Controls

Within the Controls tab, you can find various Overwatch 2 settings related to the sensitivity, keybinds, the reticle you use, and a couple of health bar options. You can also change the different interface, communication, spectate, and replay controls here.
General
Under General, you can find some pretty important things that can help you control your Hero in Overwatch 2. This includes mouse sensitivity, reticle type, and keybinds.
The mouse sensitivity that you should use should depend on your comfort. Most shooter games generally require low mouse sensitivities for precise and accurate aiming. However, it’s better if you have relatively higher sensitivity in a game like Overwatch 2, where there’s a ton of movement, high ground, and chaotic things happening everywhere.
Most professional players have an in-game sensitivity anywhere from around 2.00 to 6.00. Of course, there are outliers with very low or very high sensitivities. However, 2.00 to 6.00 is an excellent place to start for beginners and then tinkering with it, depending on how it feels in-game.
The reticle is another personal preference and comfort thing. Some players prefer small ones, while others want larger ones. Make sure to check out our complete Overwatch 2 crosshair settings guide to help you find the best crosshair to use.
Here are a few crosshair settings that I highly recommend.
The Basic Dot

| Setting Name | Setting Values |
| Show Accuracy | Off |
| Color | White |
| Thickness | 1 |
| Crosshair Length | 0 |
| Center Gap | 0 |
| Opacity | 0% |
| Outline Opacity | 100% |
| Dot Size | 6 |
| Dot Opacity | 100% |
| Scale with Resolution | On |
Traditional Crosshair

| Setting Name | Setting Values |
| Show Accuracy | Off |
| Color | Green |
| Thickness | 1 |
| Crosshair Length | 8 |
| Center Gap | 8 |
| Opacity | 50% |
| Outline Opacity | 100% |
| Dot Size | 2 |
| Dot Opacity | 0% |
| Scale with Resolution | On |
The FPS Standard

| Setting Names | Setting Values |
| Show Accuracy | Off |
| Color | Light Blue |
| Thickness | 1 |
| Crosshair Length | 5 |
| Center Gap | 5 |
| Opacity | 100% |
| Outline Opacity | 100% |
| Dot Size | 2 |
| Dot Opacity | 0% |
| Scale with Resolution | On |
Keybinds
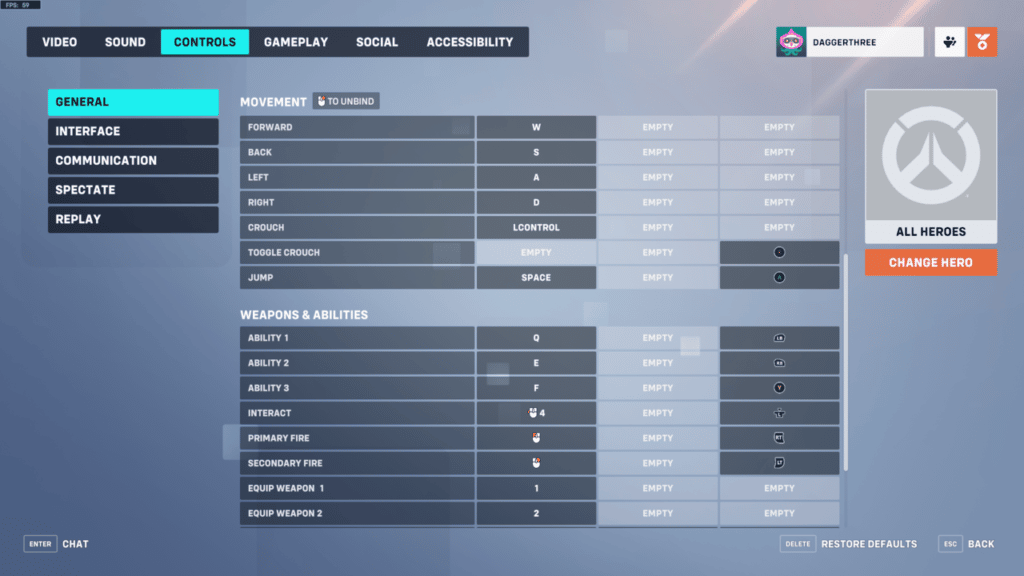
The default keybinds present in Overwatch 2 are actually pretty good. They provide great spacing for your abilities and allow you to access them without any major issues. But you can still improve them by putting a couple of abilities on your side mouse buttons or moving them to other keys.
Adjusting your keybinds can help you find a more comfortable set of controls that allow you more movement while not being hard to use. Most professional players incorporate a side mouse button or two within their keybinds because it makes your life so much easier.
Here are our recommended keybind alternatives that you can use:
| Forward | W |
| Back | S |
| Left | A |
| Right | D |
| Crouch | Ctrl |
| Jump | Space |
| Ability 1 | Q/ F/ Mouse Button 4 |
| Ability 2 | E/ Mouse Button 5 |
| Ultimate/ Ability 3 | Q/ F |
| Interact | F/ E/ Z |
| Primary Fire | Left Mouse Click |
| Secondary Fire | Right Mouse Click |
| Equip Weapon 1 | 1 |
| Equip Weapon 2 | 2 |
| Melee | V/ Mouse Button 4 or 5 |
| Reload | R |
These alternatives can help you activate your abilities faster or help you become more comfortable while gaming. These are just recommendations, so feel free to change the keybinds to any buttons that you find comfortable.
Note: You can change the different general controls for each Hero. This includes the mouse sensitivity, crosshair type, and keybinds. This handy feature allows you to customize the controls for each Hero without having to do it every game.
Interface
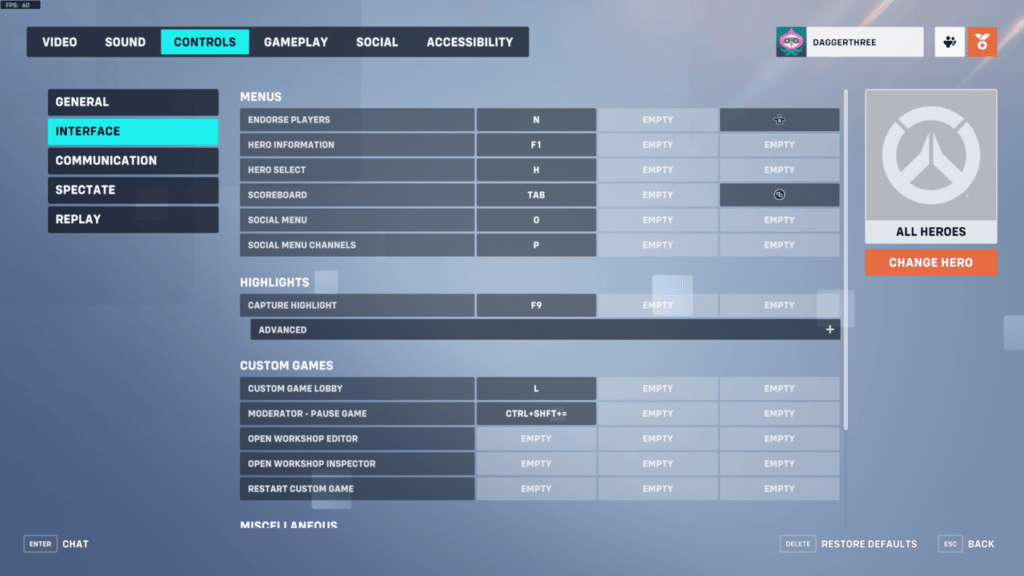
These Overwatch 2 settings are related to the keybinds that you can use in menus, custom games, highlights, and miscellaneous. Most of the settings here can be left to their defaults since you’ll rarely use them anyway.
However, here are a few keybinds to take note of that can be useful in certain situations.
| Endorse Players | N |
| Hero Information | F1 |
| Hero Select | H |
| Scoreboard | Tab |
| Capture Highlight | F9 |
| Custom Game Lobby | L |
| Pause Game (as Moderator) | Ctrl + Shift + = |
| Take Screenshot | Print Screen |
| Toggle UI | Alt + Z |
Communication
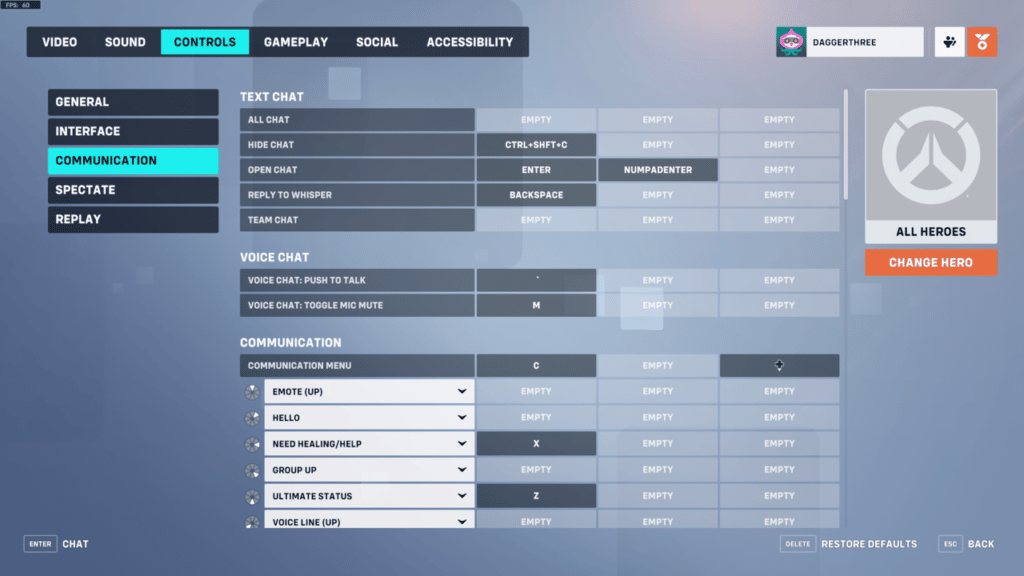
In the Communication section, you can find keybinds and shortcuts for the game’s different chat and comms methods. For the most part, these can be left at default, but feel free to change them according to your preferences.
Here are a couple of communication keybinds that might be helpful to you:
| Open Chat | Enter |
| Reply to Whisper | Backspace |
| Push to Talk | ‘ |
| Mute Mic | M |
| Communication Menu Wheel | C |
| Ping | Middle Mouse Button |
| Spray | Y |
Spectate
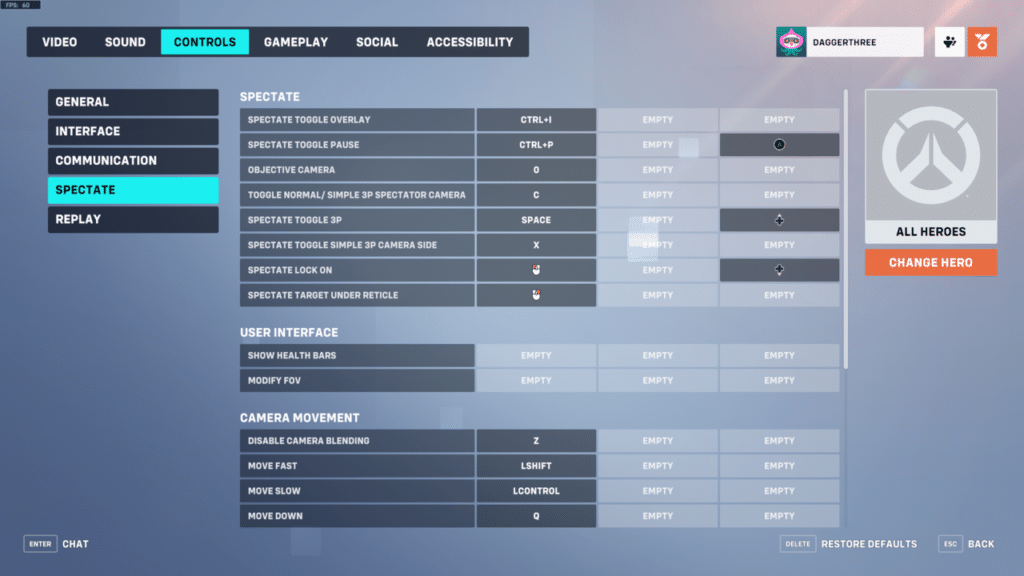
Like the section name, these Overwatch 2 settings are keybinds you can use when spectating a game. This includes toggling the overlay, some UI options, and camera movement. Most people just leave these settings at default since they are rarely used anyway.
Here are a few keybinds that you might find useful when spectating:
| Toggle Overlay | Ctrl + I |
| Toggle Pause | Ctrl + P |
| Move Fast | Left Shift |
| Move Slow | Left Control |
| Move Down | Q |
| Move Up | E |
Replay
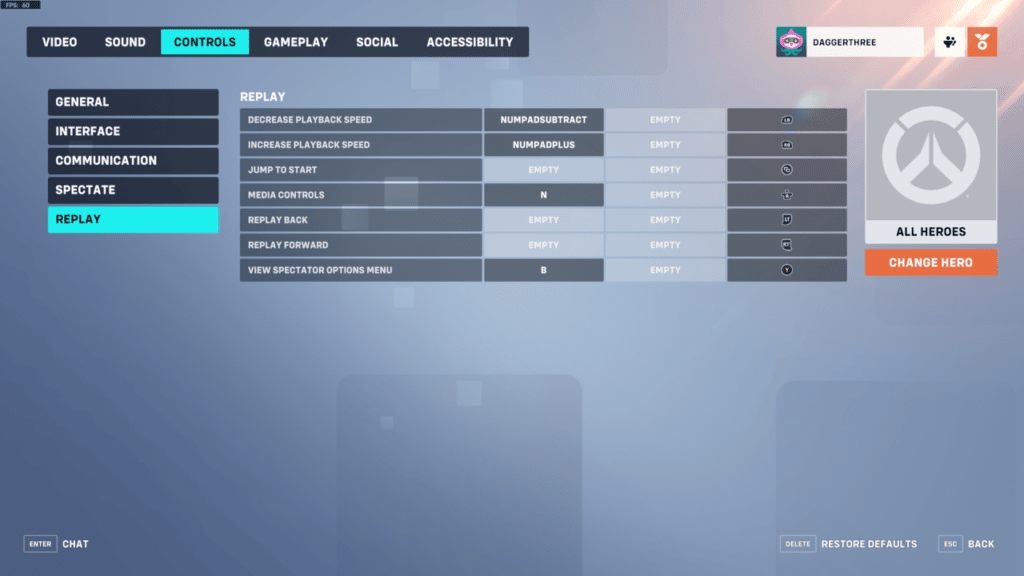
The final section found in Controls is the Replay section. These are pretty straightforward and can be used when watching replays. There are only a few keybind options here that can be used to control playback speed and show media controls.
Here are some useful replay keybinds that you can use:
| Decrease Playback Speed | Numpad Subtract |
| Increase Playback Speed | Numpad Plus |
| Media Controls | N |
| View Spectator Options Menu | B |
Gameplay

In the Gameplay section, you can find various general Overwatch 2 settings that affect your game. This includes high precision mouse input, Overwatch League spoilers, network limits, and auto queue. There are also a variety of HUD, UI, Hero, and in world settings here that you can change.
General
Within the General section, there are a few interesting settings. The “Enable Post Match Auto Queue” should be set to “On” if you want to get into another match as fast as possible. This allows you to automatically find a match after your current one has finished.
Limit client and server send rates should be off since they can affect your ping. Turning on the network quality notifications option can help you know when you have a bad internet connection.
Now, the “Enable High Precision Mouse Input” option is probably one of the most useful hidden Overwatch 2 settings. This option increases the game’s tick rate and allows for a more precise input when you click on fire. This allows you to aim at a more precise rate, especially if you have one of the best gaming mice with a high refresh rate.
The other settings can be left at default since they’re either not that useful or not commonly used.
HUD
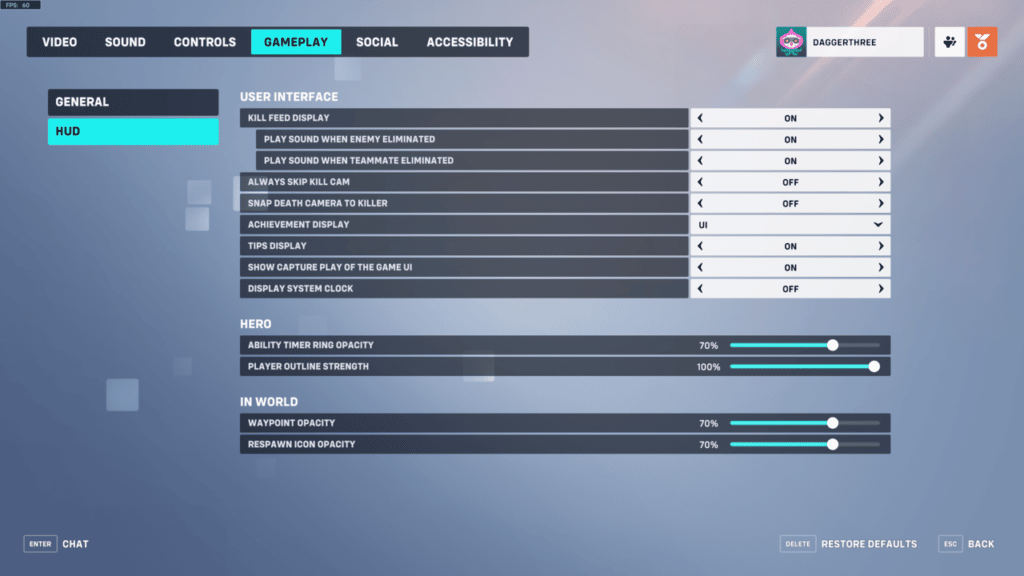
Most of the settings you see here are fine at default. We’ve already discussed the other options before kill feed display, play sound when enemy eliminated, play sound when teammate eliminated, and display system clock. For the most part, we recommend turning these settings on.
Some other interesting options within HUD are ability timer ring opacity, waypoint opacity, and respawn icon opacity. At default, these are at 100% opacity. I recommend turning these down to around 50-70%. This allows you to see through them and reduce the game’s visual clutter. You don’t really need anything at 100% opacity aside from the player outline strength.
Social
The Social tab mostly relates to the settings that affect your general communication with your team, friends, party members, and other Overwatch 2 players. There are also some text chat options here, like profanity filters, whispers, team chat, and party chat.
Privacy
Privacy contains the settings that allow you to change your profile visibility, ID display, and friend request notifications. You can also change who can invite you to games and if you want to allow other players to join your group.
You can also find some custom game settings here. This includes if custom game members can invite, who you’ll open up the custom game to, and if you want to receive invites or requests for custom games. For the most part, all of the Overwatch 2 settings under Privacy can be left at default unless you have a specific reason not to.
Text Chat

Under Text Chat, you’ll see options for chat filters, receiving whispers, and turning on or off the group, text, and match chat. By default, all of the chat options are turned on, and the profanity filters are set to friendly.
You can turn off whispers or set it to favorites only so that not everyone can send you a message. The other chat options can only be turned on or off. However, I do recommend leaving them on since some people can only communicate via chat.
For the profanity filters, you have three options; Friendly, Mature, and Unfiltered. By default, it’s set to Friendly, which filters out anything that the game deems offensive. The Mature filter will allow some curse words and only censors extremely offensive or abusive language. Finally, Unfiltered won’t filter anything out.
Accessibility
Finally, we have the Accessibility section. The Overwatch 2 settings here include camera shake and motion, subtitles, color blind filters, speech-to-text, and text-to-speech. These settings help make the game more accessible to everyone, even those who have disabilities, allowing anyone to enjoy the game.
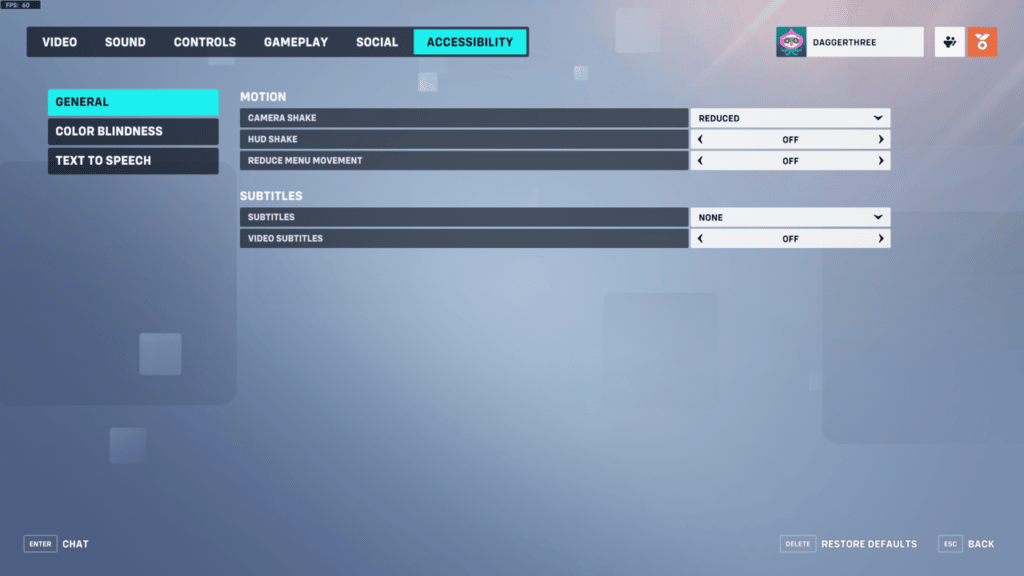
General
Here you can find settings for motion and subtitles. It’s recommended to put the camera shake to “reduced” and turn off the HUD shake. The camera shake can get annoying or distracting within the game, especially if you’re using a Hero with a ton of mobility. This reduces distractions and allows you to focus on the game.
The other settings are fine left at default or up to your personal preference.
Color Blindness
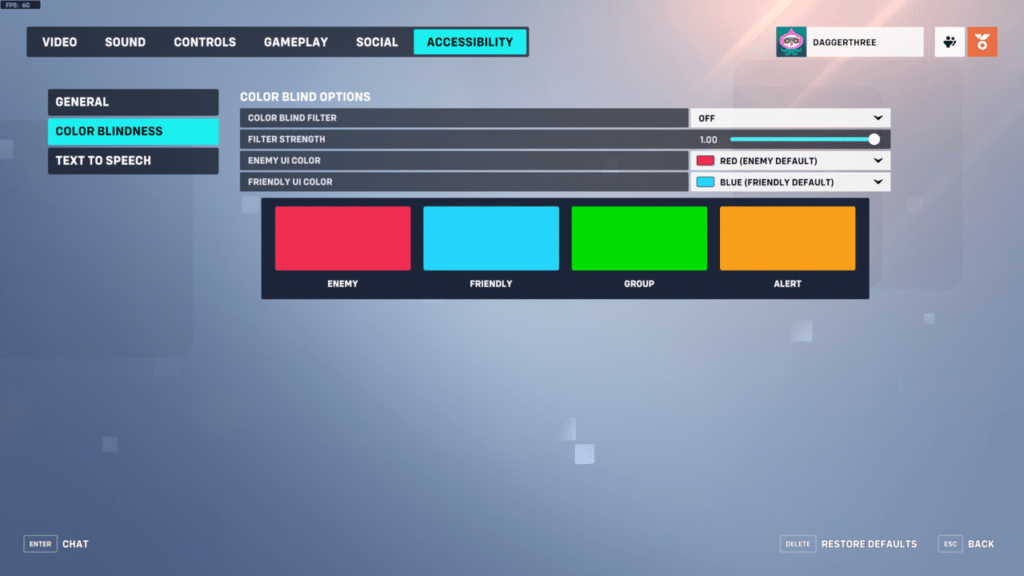
The Color Blindness section is pretty straightforward. It allows you to add a color filter that can help you see the game better if you are color blind. Overwatch 2 offers Deuteranopia, Protanopia, and Tritanopia filters. There’s also a filter strength slider that allows you to adjust the filter according to your needs.
Text To Speech

Finally, we have Text To Speech. Like the Color Blindless section, Text To Speech aims to make Overwatch 2 a more inclusive game and helps people with disabilities or trouble hearing, speaking, or seeing to still enjoy the game. This is an important factor, especially with the growing number of Overwatch 2 players trying out the game daily.
If you don’t have any trouble hearing or speaking, then you can pretty much leave these settings alone.
Conclusion
That’s a complete breakdown and your guide to the best Overwatch 2 settings that you can use. Some of these settings can definitely help you play better, even if you aren’t using one of the best Overwatch 2 Heroes.


