I’m sure anyone looking to rank up in a game like Valorant is willing to take any competitive advantage. One of the easiest and fastest ways is to optimize your Valorant settings. Some of the Valorant settings will help you maximize performance, while others can help you improve gameplay.
There are a variety of Valorant settings available from the menus. However, only a few of them are important to improve your experience. Here’s our list of the best Valorant settings that you should change.
General Valorant Settings
The “General” tab will be the first thing that you see when you open up the Valorant settings from the main menu. The General tab will include the different options for accessibility, mouse sensitivity, map settings, privacy, and other game settings.
We’ll only talk about the General settings that we recommend that you change when playing Valorant. So, other settings that you can’t find here probably aren’t as important as you think they are.
Accessibility
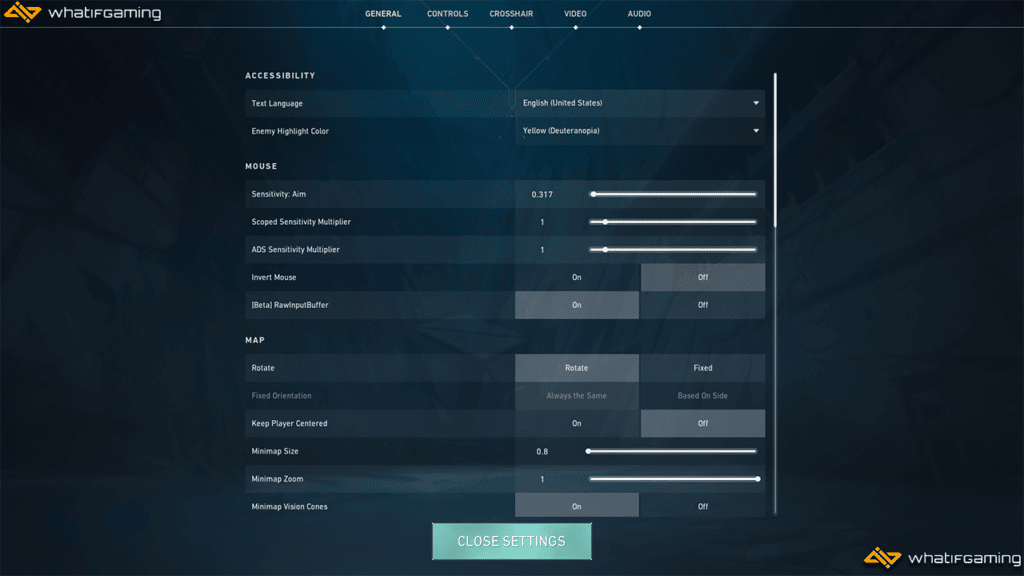
The only option here that can help you in-game is the Enemy Highlight Color. Most of the top-tier players like using Yellow (Deuteranopia or Protanopia) as the highlight color since it’s easier to see on most maps and generally stands out better than Red (Default).
Mouse Settings
The first setting that we are going to talk about are the Mouse Settings. There are only a few options here, affecting how the game reacts to your mouse movements.
You can find the Mouse Settings under the “General” tab.
- Sensitivity: Aim – Determines how fast your crosshair moves in the game. Low sensitivity is generally better for more precise aiming.
- Scoped Sensitivity Multiplier – Determines how fast your crosshair moves when scoped in. Typically lies within the 0.8 to 1.2 range.
- ADS Sensitivity Multiplier – Determines how fast your crosshair moves when using ADS (right click) on available weapons. Generally, it’s recommended to keep this at 1.
- Invert Mouse – Inverts the direction that your crosshair moves in relation to your mouse. It’s recommended to keep this setting off.
- Raw Input Buffer – Valorant gets input directly from your mouse rather than passing it through your operating system. It’s recommended to keep this setting on.
The sensitivity settings are the most important option you need to tweak here. It can take you a while to find the best Valorant sensitivity setting that you are most comfortable with, but it will definitely be worth it.
Map
Here are our recommended map settings that you should choose. These settings are also what some of the best Valorant players use, so feel free to copy them.
| Map Settings | Options |
|---|---|
| Rotate | Rotate |
| Keep Player Centered | Off |
| Minimap Size | 0.8 |
| Minimap Zoom | 1 |
| Minimap Vision Cones | On |
| Show Map Region Names | Always |
Having the minimap size and minimap zoom at 0.8 and 1, respectively, allows you to completely see the whole map at all times. This allows you to see any information that appears only on the map and see the location of your teammates and visible enemies.
Choosing to turn on map rotation also allows you to easily orient yourself and locate where you are respective to the map. Keeping it fixed can be quite confusing at times, so many people prefer it rotating.
Other Settings

There are a ton of settings that you can find here, but there are only a few that we recommend you change. Here are our recommended settings for options found in the “Other” tab.
- Show Mature Content (On) – Allows you to change the corpses and blood options.
- Show Corpses (Off) – Replaces corpses with a hologram, reducing visual clutter and increasing FPS a little.
- Show Blood (On) – Allows you to see blood spatter when enemies are hit. This can give you additional information through smokes or walls.
- Instability Indicators (On) – Shows icons related to the conditions of your network.
- Show Bullet Tracers (Off) – Disables your visual bullet path. Turning this off is recommended since it can be distracting and isn’t fully synced to your spray.
All other settings are up to your personal preference or only applicable when you observe in custom games. For the most part, you should be good if you just follow the settings we’ve recommended above.
Keybinds
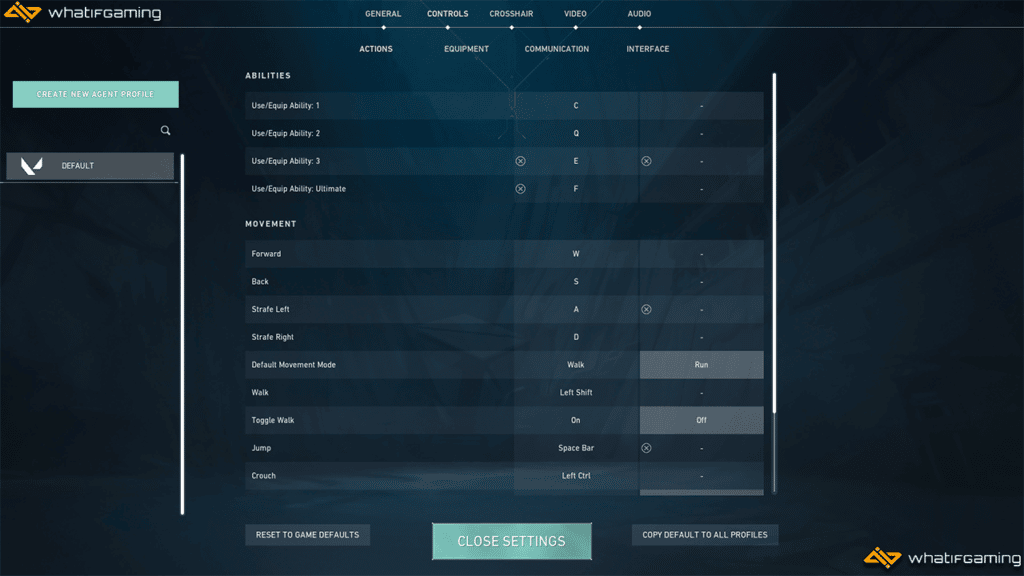
Next up on our ultimate guide to Valorant settings is all about the different controls and keybinds you use in the game. There are quite a few controls that you’ll have to use. This includes skills, communication, movement keys, and other general controls. Remember to always put your comfort first and make sure that you can easily reach all the buttons that you need.
Creating Your Own Keybinds
Creating your own keybinds can be a challenging but fun job to do. You get to explore with the keys that you like and get to test out what feels comfortable and what doesn’t. Finding the best keybinds for you can help you unlock your full potential.
Here are a few things that you should remember when creating your own keybinds:
- Make sure that you can comfortably reach and press each button
- Each keybind should be unique and don’t interfere with other actions
- Important actions like skills, plant/defuse spike, and should be bound to different keys that are pressed using different fingers. i.e., Ability 1 – Ring, Ability 2 – Index, Ultimate – Thumb, etc.
- If you have available mouse buttons, utilize them as much as you can. This frees up your other fingers for other actions.
Recommended Keybinds Settings for Valorant
If you don’t like the idea of creating your own keybinds or have no idea where to start, you can also copy some common keybinds. Here are our recommended keybinds that you can use for Valorant.
| ACTION | KEYBIND |
|---|---|
| Ability 1 | E /Mouse Button 1 |
| Ability 2 | Q/ Mouse Button 2 |
| Ability 3 | C |
| Ultimate Ability | X |
| Jump | Space Bar/ Scroll Wheel |
| Crouch | Left Control |
| Use Object | F/ E |
| Walk | Left Shift |
| Use Spike (Plant or Defuse) | 4/ F |
Another option we recommend you use is setting your Sniper Rifle Aim to “Hold” instead of “Toggle.” This allows you to go in and out of your scope way faster than using the default “Toggle” setting. It’s especially helpful when recording your games and getting those quick scope highlights.
Remember: The keybinds above are there so that you have a guide. You are free to copy all of them, use some of them, or don’t use them at all.
Check out our best Valorant keybinds guide if you want a more in-depth analysis of the different controls and keybinds.
Best Valorant Crosshair Settings

Let’s move on to one of the most important Valorant settings in the game. Overall, everyone has their own preferences when it comes to their crosshairs. Some prefer to use a traditional cross, some like a simple dot, while others want more complex ones. No matter what you choose is completely up to you. As long as you can pop heads with it, you’re good to go.
Optimizing your crosshair is one of the easiest and fastest things you can change to improve your aim. Of course, taking the time to use aim trainers or upgrading to one of the best Valorant mice can also help.
Note: Remember to turn on the “Use Advanced Options” setting if you want to customize your ADS and sniper scope crosshair as well.
Choosing Your Valorant Crosshair
Now, this is where the fun begins. Under the Primary tab, you can see all the different crosshair options from center dots, color, outlines, inner and outer lines, and a few others.
One of the best additions to Valorant’s crosshair settings is the ability to choose a custom color for your crosshair. All you have to do is to choose “custom” as your crosshair color, input the hex code, and you’re good to go. Check out our best Valorant crosshair hex codes list if you’re looking for custom colors.
When creating a crosshair, there are a few things that you have to remember. An ideal crosshair to use in Valorant should have the following qualities:
- Offers excellent visibility and can easily be seen in different scenarios and backgrounds
- Doesn’t distract you
- Doesn’t fully cover your enemies
- Allows you to comfortably aim during the game
Using these guidelines, you can create an amazing crosshair that can help you improve your game, get more kills, and stack up those wins.
There isn’t a “one size fits all” crosshair since the best one for you might not work for a different player. A great starting spot is to use the 1-4-2-2 crosshair. It’s an extremely popular crosshair within the Valorant player base. The 1-4-2-2 provides a great middle ground between a large and small crosshair, allowing you to adjust it according to your preference.
1-4-2-2 crosshair code: 0;s;1;P;c;1;h;0;0l;4;0o;2;0a;1;0f;0;1b;0
Here are some additional crosshair codes from professional players that you can use as a base crosshair:
- TenZ Crosshair Profile Code:
0;s;1;P;c;5;h;0;m;1;0t;1;0l;3;0v;2;0g;1;0o;2;0a;1;1b;0;S;c;4;s;0.8;o;1 - ScreaM Crosshair Profile Code:
0;s;1;P;c;5;o;1;d;1;z;3;0b;0;1b;0;S;c;4;s;0.8;o;1 - Shroud Crosshair Profile Code:
0;s;1;P;c;5;h;0;m;1;0l;4;0v;2;0o;0;0a;1;1b;0;S;c;4;s;0.8;o;1 - nAts Crosshair Profile Code:
0;s;1;P;c;1;o;1;0t;1;0l;2;0o;2;0a;1;0f;0;1b;0;S;c;1;o;1 - f0rsakeN Crosshair Profile Code:
0;s;1;P;c;8;u;000000FF;o;1;b;1;0t;3;0l;1;0v;0;0g;1;0o;0;0a;1;0f;0;1t;1;1l;4;1g;1;1o;0;1a;1;1m;0;1f;0;S;t;000000FF;s;0.664;o;1
If you’re still having trouble choosing or creating your crosshair, make sure to check out our best Valorant crosshairs & codes guide.
Best Valorant Graphics Settings
The graphics quality is one of the most important parts that you have to change if you’re looking to maximize the performance of your device. Sometimes you have to choose between performance and looks. In a game like Valorant, performance is far more important than looks.
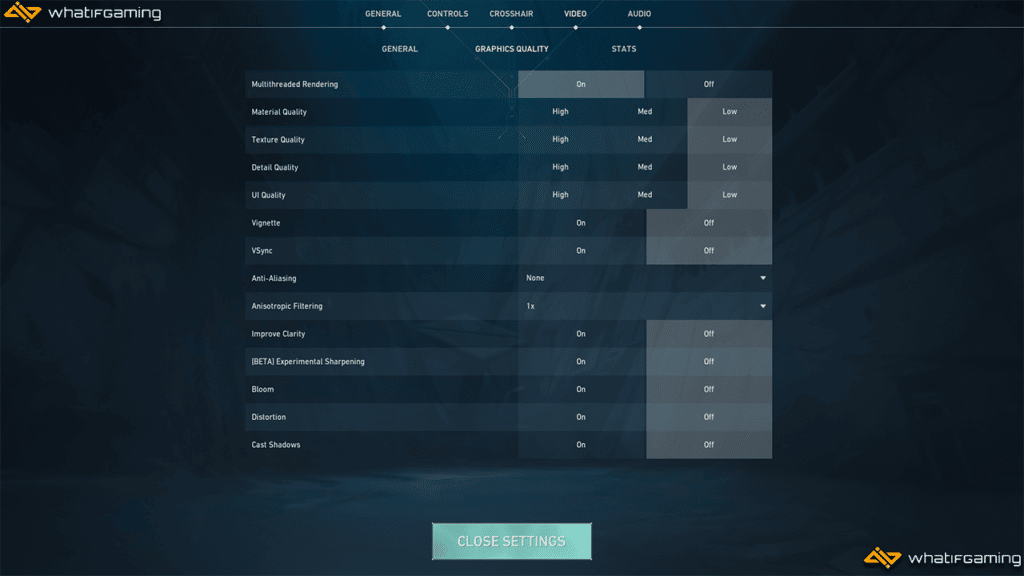
Here are our recommended graphics quality settings in Valorant to get the most out of your PC. These are also the settings that most professional players and streamers use that help increase their FPS.
| GRAPHICS QUALITY | OPTIONS |
|---|---|
| Multithreaded Rendering | On |
| Material Quality | Low |
| Texture Quality | Low |
| Detail Quality | Low |
| UI Quality | Low |
| Vignette | Off |
| VSync | Off |
| Anti-Aliasing | None |
| Anisotropic Filtering | 1x |
| Improve Clarity | Off |
| Experimental Sharpening | Off |
| Bloom | Off |
| Distortion | Off |
| Cast Shadows | Off |
In a game like Valorant, lowering your settings is important since this can help minimize lags and FPS drops. Even the top professional players with some of the best gaming PCs around still set their settings to the lowest.
Some settings can hinder you more than help you, especially since they add extra effects to the game’s smokes, walls, and other objects.
You should also consider putting your game in fullscreen to allow your device to allot the maximum resources it can to Valorant. Also double-check if the refresh rate under “Resolution” matches your current monitor settings.
Best Valorant Audio Settings
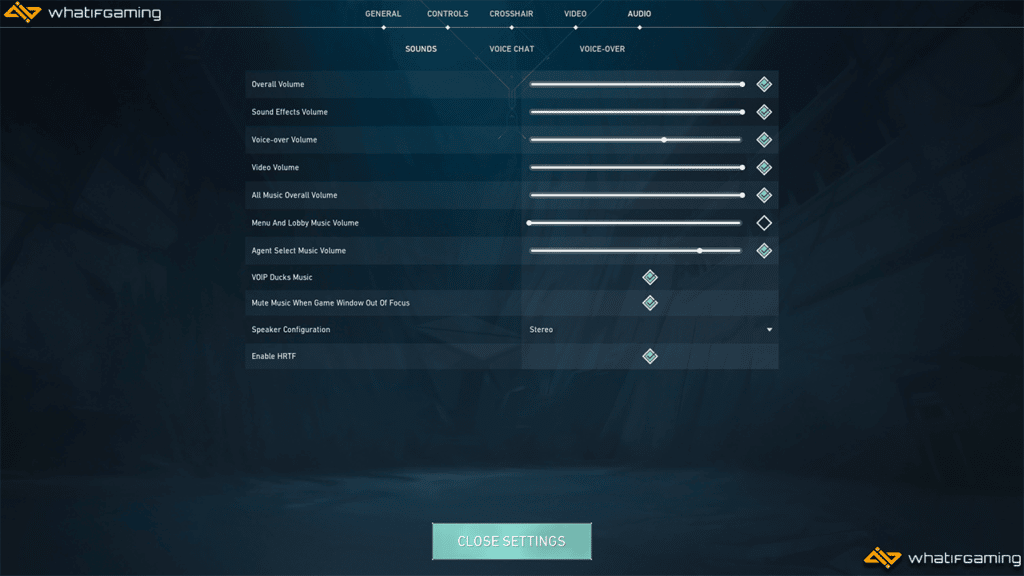
The main option you should be on the lookout for in audio settings is HRTF (Head Related Transfer Function). Enabling HRTF helps you locate where the sounds and audio cues are coming from. This is especially helpful for footsteps, reloading, and dropping, among others.
I also suggest turning up the volume slider to the maximum that feels comfortable to your ears. This can help you hear the various in-game sounds better. Of course, nothing beats a good old-fashioned upgrade to one of the best Valorant headsets.
Best GPU Settings for Valorant
You can also optimize your settings outside of Valorant. One of the main contributors to your FPS is your GPU settings. Here are a few settings that we recommend using for your GPU to help improve Valorant’s performance.
Best NVIDIA Settings for Valorant
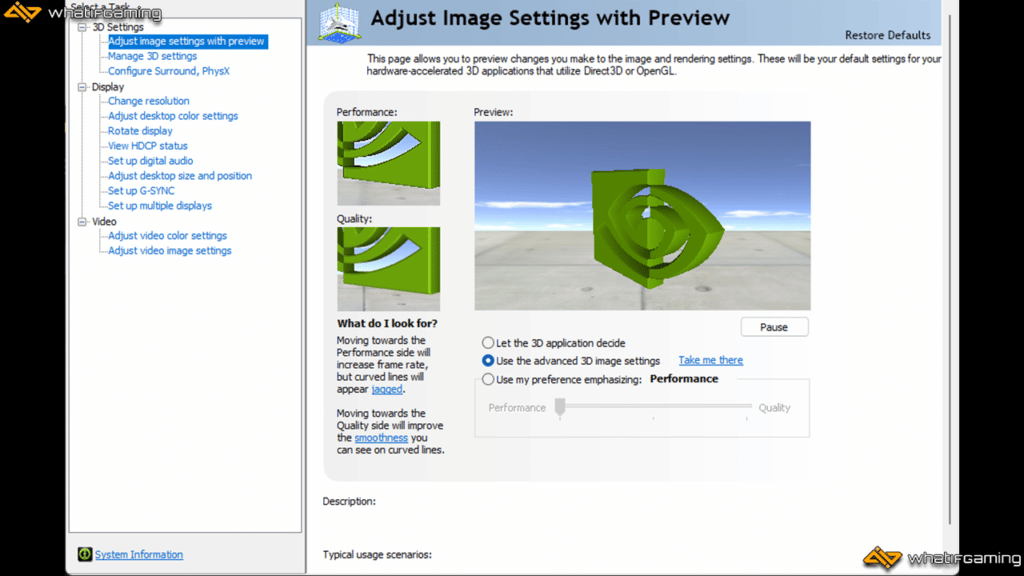
- Right-click on your desktop and select “NVIDIA Control Panel.”
- Under “3D Settings,” select “Manage 3D settings.”
- Change the following settings:
| CUDA – GPUs | All |
| Low Latency Mode | On/ Ultra |
| Power management mode | Prefer maximum performance |
| Texture filtering – Quality | High performance |
| Virtual Reality pre-rendered frames | 1 |
Make sure to also double-check if you’re running on your monitor’s rated refresh rate using these steps:
- Open the NVIDIA control panel.
- Under “Display,” select “Adjust desktop size and position.”
- Select the highest supported refresh rate of your monitor.
Best AMD Radeon Settings for Valorant

- Right-click on your desktop and select “AMD Radeon Software.”
- Click on the settings icon in the upper right corner of the screen and go to the “Graphics” tab.
- Click “Advanced” and change the following settings:
| Frame Rate Target Control | Enabled and set to your monitor’s max refresh rate. |
| Texture Filtering Quality | Performancee |
| Surface Format Optimization | Enabled |
| Tessellation Mode | AMD optimized |
| OpenGL Triple Buffering | Disabled |
You can also enable Radeon Anti-Lag for a crispier response time and turn off Vertical Refresh. However, these settings don’t work for others, so experiment with which one is the best for you.
Best Windows Settings for Valorant
Aside from the various in-game settings in Valorant, a few Windows settings can help you squeeze out some extra FPS. Here are a few things you can do to optimize your Windows OS when playing Valorant.
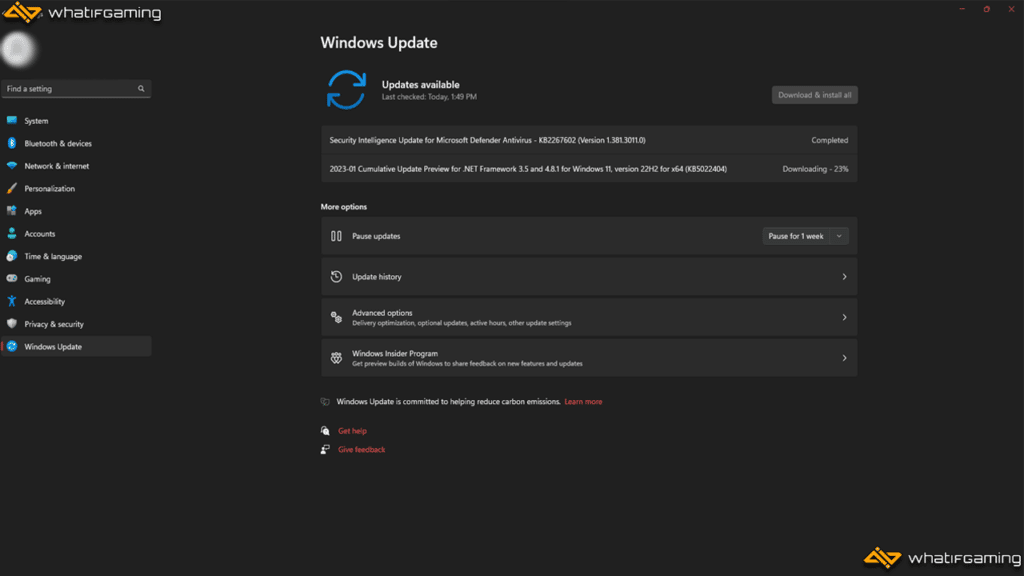
Keep your Windows Version Updated
- Click on the search bar and go to “Check for updates.”
- Press the red “Check for updates” button.
- Click on the “Download & install” button next to any pending updates.
Note: You might have to restart your computer after installing the updates.
Keeping Windows updated is a great way to ensure that your game continues to run smoothly and uses the latest features of Windows.
Set Valorant to High Performance
- Search for “Graphics Settings” using the search bar.
- Find Valorant from the list of apps. If you can’t find it, add it using the Browse button.
- Click on Valorant and choose the “Options” button.
- Change the graphics preference to “High performance” and click on save to exit.
Settings Valorant to high performance lets your PC prioritize it and dedicate more resources to it. This can be a huge changer for gaming laptop users out there and can result in some decent performance gains.
Turn Off Background Apps
- Press ctrl + alt + delete on your keyboard and select “Task Manager.”
- Select the “Startup Apps” tab.
- Go through the list and find any unnecessary apps.
- Right-click on each app you find and select “Disable.
Turning off background apps can help you eliminate unused apps running in the background and stealing valuable resources from Valorant.
Disable Enhanced Pointer Precision
- Search for “Mouse Settings” using the search bar.
- Click on “Additional mouse settings.”
- Go to the “Pointer Options tab.”
- Make sure that the “Enhance pointer precision” option is left unchecked.
- Click “Apply,” then click on “OK.”
This option doesn’t increase your FPS but can help your aim become more consistent. Enhance pointer precision automatically adjusts the sensitivity of your mouse depending on how fast you move it. This can make it hard to build muscle memory, especially when flicking.
Conclusion
That’s all for our ultimate guide to the best Valorant settings to help you maximize your game. Most of these settings are what most professional players use, helping them become the most effective and best Valorant player they can be.
Hopefully, you were able to learn a thing or two about the different Valorant settings. We hope that these settings will help you reach your fullest potential.
Make sure to leave a comment if we missed out on any other important Valorant settings.


