This Destiny 2 Sails of the Shipstealer walkthrough has been hand-made to help walk you through Season of Plunder – whether you’re a new, returning, or veteran Guardian. I’m going to break down every individual quest step and clear up any confusion you might have regarding where to go or what to do.
Bungie is notorious for not exactly being clear with a lot of its in-game descriptions, so my goal is to spell out what they don’t. I’ve broken this Sails of the Shipstealer walkthrough up into weeks and steps, so it should be pretty easy to follow along. There’ll also be a new section every Tuesday on reset. So, make sure you’re checking back every week for the next quest steps and more Destiny 2 guides.
Destiny 2 Sails of the Shipstealer Walkthrough
Sails of the Ship Stealer Week 1
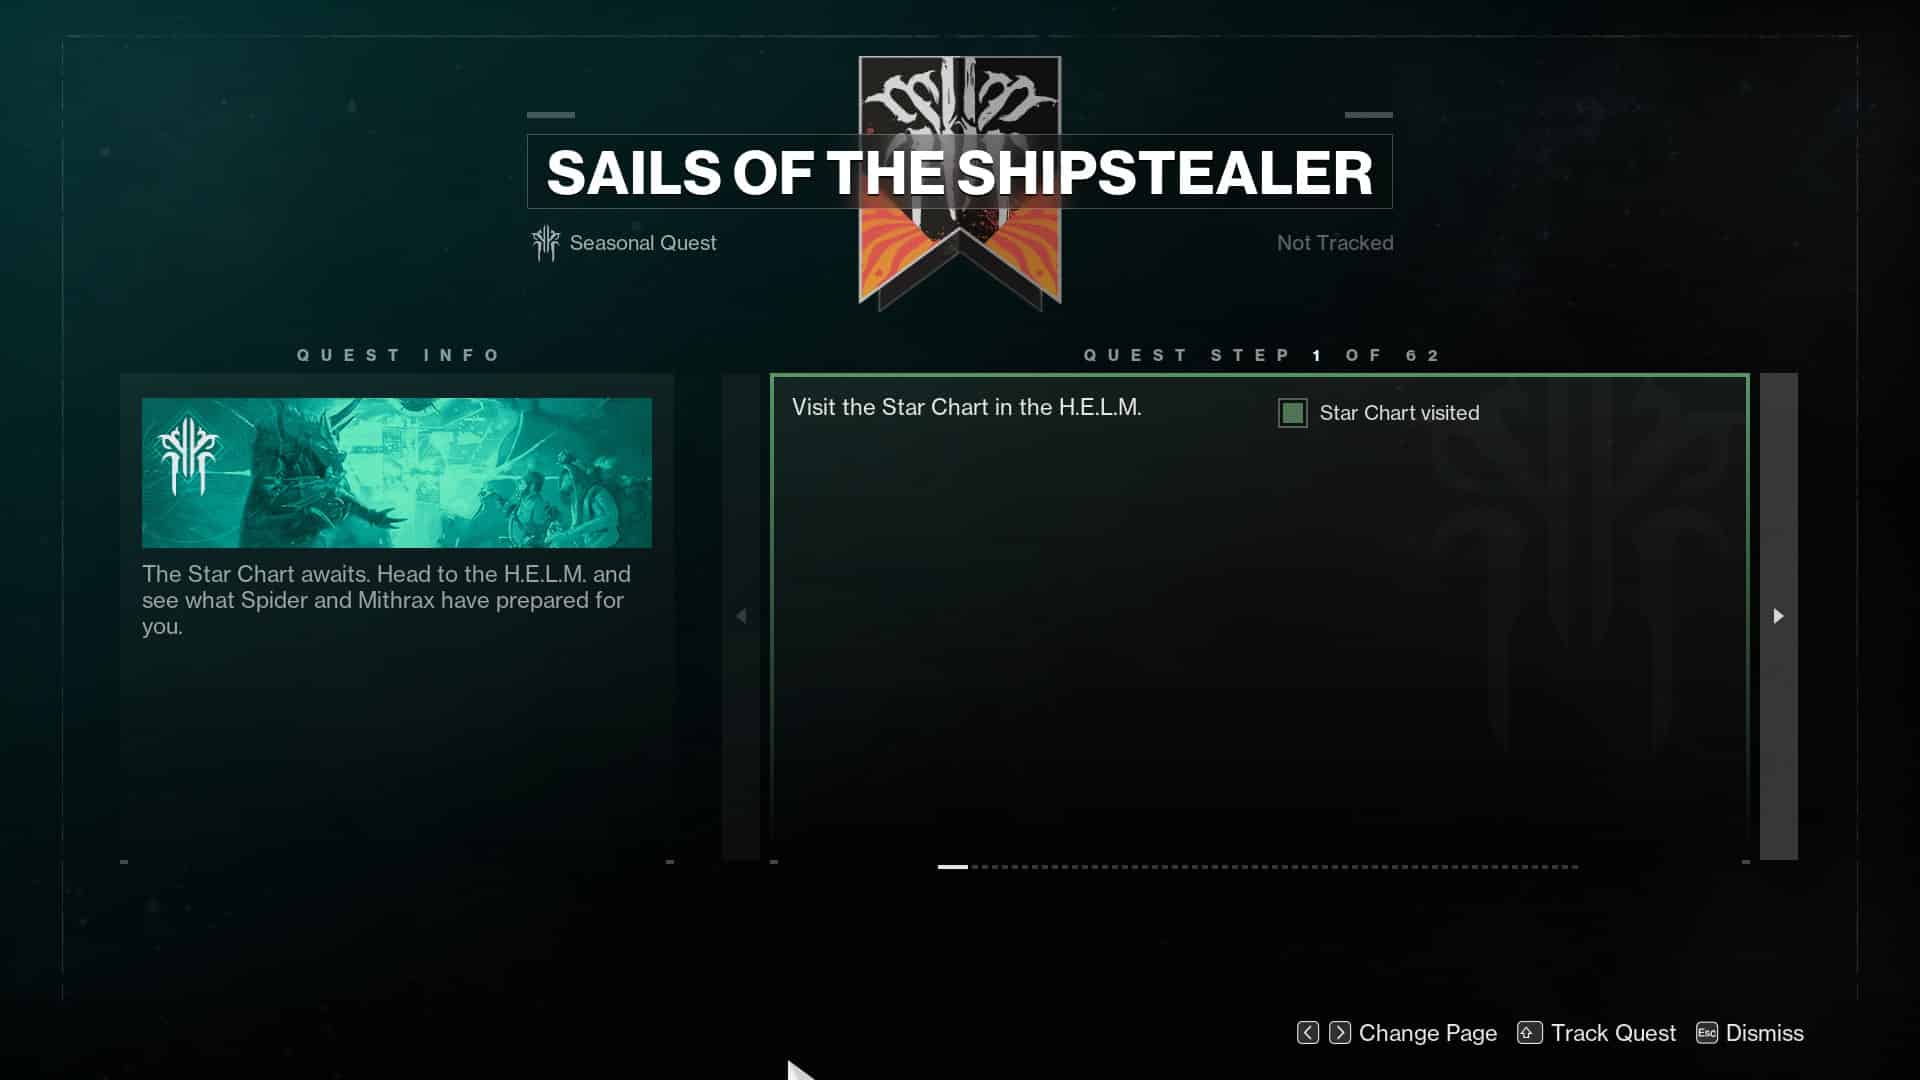
Step 1 – Visit the Star Chart in the H.E.L.M.

Okay, kicking off this Destiny 2 Sails of the Shipstealer walkthrough, we have step 1 – visit the Star Chart in the H.E.L.M.
The Star Chart is our new Seasonal vendor, although it doesn’t take up a wing of the H.E.L.M. like the vendors of old. Instead, it’s a massive Fallen treasure horde just sitting smack-bang in the middle of the H.E.L.M. I’m not sure why we couldn’t have our Ketch as a social area and have the vendor there, instead – it just feels really out of place here.
Plus, the H.E.L.M. was meant to be overrun with Egregore but that’s just… gone now, I guess.
Either way, you’ll need to pop into it to say hi and pick up a few essentials to help with your new pirate ambitions.
Step 2 – Restore a Treasure Map in the Captain’s Atlus Using Map Fragments

It’s been a few seasons since Destiny has had a seasonal item that sits in our quest menu. We’re back at it, though – this time with the Captain’s Atlas that we got from the Star Chart. This is what’s going to give us the bonus currency we need to open treasure chests at the end of Expeditions.
The Captain’s Atlas is similar to the Hammer of Proving and Battlegrounds missions back in Season of the Chosen. Instead of slotting in Medallions to smash chests, we’re using Map Fragments to create treasure maps to dig up chests at the end of the mission.
Step 3 – Loot the Buried Treasure at the End of an Expedition Mission

On the topic of buried treasure in Expeditions, you need to use your now completed Treasure Map to dig some up at the end of one. It’s this season’s activity like Nightmare Containment was for Season 17. Unlike Nightmare Containment, though, it launches straight from the H.E.L.M. rather than being its own patrol zone.
It’s not a hard activity by any means. Just play through it, and once you get to the end – dig up one of the three marked treasure mounds just behind the mission completion chest.
Step 4 – Claim the Successful Expedition Weekly Challenge

This is a bit of an unusual one – Sails of the Shipstealer step 4 requires you to go into your weekly seasonal challenges and claim “Successful Expedition.” It’s pretty simple to complete – just head into your quests menu, click on Seasonal Challenges, and claim the first one. You’ll also get a chunk of XP and a Repute that’s used to upgrade the Star Chart in the H.E.L.M.
Step 5 – Upgrade the Star Chart in the H.E.L.M.

Speaking of that, your next Sails of the Shipstealer step requires you to use your newfound Repute to upgrade the Star Chart. In the Star Chart menu, under where it says Pirate Crew, you’ll see a big symbol. Click into it and you’ll be presented with a screen that has a bunch of individual upgrades divided into three categories. Most of them will be locked for now – don’t worry about that. Just pick and unlock one of the first ones. You’ll gain access to the rest in the following weeks.
Step 6 – Complete Pirate Hideout: The Brute

After you complete that seasonal challenge, it’s time for your first run of this season’s weekly seasonal quest. Pirate Hideouts are replacing Sever, and like Sever it seems we’ll have a new one each week up until the last few weeks of the season in December.
Sails of the Shipstealer week 1’s mission is Pirate Hideout: The Brute. It launches from the H.E.L.M. and it’s not a hard mission by any stretch of the imagination. Just rush through it, kill the boss, and collect the relic.
Step 7 – Speak to Eido on the Holoprojector in the Eliksni Quarter

Collecting the relic at the end of Pirate Hideout: Brute will bring you up to step 7 in this Sails of the Shipstealer walkthrough. You’re done with all the hard work at this point – all that’s left is a brief return to the Eliksni Quarter in the H.E.L.M. to have a chat with some old pals.
First up – Eido. When you load into the Quarter, there’ll be a holographic projector pretty much right in front of you. Interact with it to receive a message from everyone’s favorite curious Eliksni.
Step 8 – Visit the Spider in the Ether Tank in the Eliksni Quarter

After having a lovely catch-up with Eido, you’ll need to check in with Spider – a character that is distinctly less… approachable. He’ll offer you one of three potential rewards with no way to tell the difference between each. I got a red border variant of the new seasonal shotgun, so I assume each engram is a red border of a different new weapon. Pick one, and you’re pretty much done with Sails of the Shipstealer week 1.
Step 9 – Check in With Spider in the Either Tank

Bungie has this habit of doubling up on seasonal quest steps. In this case, both steps 8 and 9 involve you talking to the Spider – it’s just different dialogue each time. You should automatically complete this while doing step 8, but if you don’t, just speak to Spider again.
Sails of the Ship Stealer Week 2
Step 11 – Check in With the Star Chart in the H.E.L.M.

Sails of the Shipstealer week two is going to start off the same way pretty much every week is going to start – with a trip to the Star Chart in the H.E.L.M.
When you get there, Mithrax will call you for a chat. You’ll get some seasonal story details before he leaves you be, at which point you should pick up your bounties from the Star Chart. After that, do either step 12, or if you don’t have the materials for a treasure map in your Captain’s Atlas – a Ketchcrash, first.
Step 12 -Defeat Targets and Loot Expedition Buried Treasure

Step 12 requires you to complete an Expedition and loot the buried treasure at the end of the mission. To loot Expedition buried treasure, you need a treasure map active in your Captain’s Atlas. If you haven’t got the materials for that, you’ll need to get them before you can continue with Sails of the Shipstealer.
The Expedition mission for Season of Plunder week two was on the Cosmodrome. Depending on when you’re doing your quest, though, it’s possible you’ll have a different location.
The missions are simple – just run through them and make sure you loot the buried treasure, not just the end chest.
Step 13 – Complete Pirate Hideout: The Sharpshooter

Pirate Hideout: The Sharpshooter is up next for this week’s artifact chase. Just like week one – it’s a super simple mission to complete. There really is no challenge here at all. Load into the mission, kill the boss, and loot the artifact. It’s that simple.
Step 14 Witness the Conversation in the Ether Tank

I’m quite a fan of the seasonal story Bungie is telling here. It’s clear that Mithrax knows more than he’s letting on, and that’s continued to be hinted at in this quest step. Step 14 literally requires you to go to the Ether Tank (where Spider is in the Eliksni Quarter), and watch him and Mithrax beef it out. It’s pretty entertaining, so you might want to pay attention to it.
After getting his ass handed to him, Spider will send you out of the bar – embarrassed by the previous display.
Step 15 – Check in with Drifter Through the Holoprojector in the Eliksni Quarter

Head out to the holoprojector just outside of the Ether Tank for a chat with your old friend Drifter. As it turns out, these old relics that we’re chasing every week remind him of something particularly nasty from long ago. He tells you that he’s going to do his own research into the matter – so expect him to come up with some answers in the following weeks.
After that, it’s a trip back to Spider to close out Sails of the Shipstealer week two.
Step 16 – Return to Spider

As always, we finish the week up by chatting with Spider. He’s gotten over himself after his row with Mithrax and will offer you one of three engrams just like last week.
Unlike last week, I didn’t get a red border weapon. Instead, I got green boots… that’s a bit of a slap in the face considering how hard it is to get Deepsights this season. I’m assuming the reward you get is random at this point, but if anyone else got these boots, please let me know.
Step 17 – Finish Up Your Conversation With Spider

Finish speaking with Spider and you’ll be all done for this week. The seasonal gameplay loop is starting to emerge this week, and while it’s simple and short, it’s also extremely entertaining. Hopefully, Bungie can keep this momentum up going into week three.
Sails of the Shipstealer Week 3
Step 19 – Check in at the Star Chart in the H.E.L.M.

Okay, week three is out and about. Despite being a short week for Sails of the Shipstealer, this might be my favorite installation in the seasonal quest thus far. Things are really heating up between Spider, Mithrax, and Eido. The mystery surrounding Mithrax and his history with the House of Wolves is enthralling and I genuinely cannot wait to see what we learn next week.
For now, though, you’ll be heading back to the Star Chart in the H.E.L.M. to have a chat with the aforementioned Mithrax. You’ll get a bit of dialogue on the Holoprojector before being sent on your way. Season of the Plunder is starting to settle into its gameplay loop, so expect this style of “see Star Chart, do Expedition, do Pirate Hideout, go to Eliksni Quarter” for the next few weeks.
Step 20 – Loot Buried Treasure at the end of an Expedition and Defeat Combatants on Nessus

The Expedition for Sails of the Shipstealer week three is Nessus. Step 20 of the quest requires you to loot a buried treasure at the end of an Expedition – it doesn’t have to be Nessus. However, as an additional task, step 20 also calls for you to kill Cabal on Nessus.
You don’t have to kill these Cabal in an Expedition, but you are awarded bonus progress for doing so. One run of Expedition: Nessus is more than enough to complete the full task.
It’s important to point this out because you’re not guaranteed to load into Expedition: Nessus when you boot up the Expedition playlist during week three. I, for example, loaded into the Europa variant of the mission.
The later you wait to complete Sails of the Shipstealer, the worse I imagine this will be. As more Expedition locations are added to the playlist, your chances of getting a specific one reduce drastically – so keep that in mind if you’re doing this quest later on rather than on release.
Also, remember that you need to actually loot the Buried Treasure at the end of an Expedition for this quest step to count. So, you’ll want to make sure your Captain’s Atlas has a Treasure Map equipped in it. If it doesn’t, you’ll want to hit up Ketchcrash for some Map Fragments before you do anything.
Step 21 – Complete Pirate Hideout: The Blademasters

Once you’ve finished up with your Expeditions (Nessus is actually one of the harder variants of the activity), it’s time for your next Pirate Hideout. Just like in previous weeks, The Blademasters are complete walkovers that you could beat with two hands tied behind your back.
The arena is straightforward, with the only bit of complication coming from the boss battle. You’ll be fighting two Cabal Gladiators that alternate between each other. When one is attacking, the other is shielded. This sounds troublesome, but it isn’t. Just hit whichever one is vulnerable until it puts its shield up, and then do the same for the other. Rinse and repeat until both of them are dead.
Step 22 – Witness the Conversation in the Ether Tank

After finishing up the Pirate Hideout, you’ll be heading back to the Eliksni Quarter from the H.E.L.M. Once again, you’ll be popping into the Ether Tank to bear witness to Spider, Mithrax, and Eido having a rather heated debate. These little segments are the highlight of Season of Plunder for me so far. The insight we’ve been getting into Eliksni politics has been great, and I would literally die for Eido.
This week is easily the best of the lot so far. It’s a big melting pot of intrigue, deception, and mystery, topped off with some tense family dynamics between Mithrax and his adopted daughter.
Even if you don’t typically pay attention to the seasonal story, make a point of doing so here. At the very least, try to keep up with what we learn about Mithrax’s past – I have a feeling that’s going to be very important come the end of Season 18, and beyond.
Step 23 – Check in with Drifter at the Holoprojector

After awkwardly standing there watching Mithrax threaten Spider with torture in front of his own daughter, you’ll want to step out for a bit of fresh air. Pop around the corner to the Holoprojector and phone up Drifter to try and lighten the mood a bit.
He’s still conducting his own investigation independent of Mithrax and Spider, but for now, you’ve just got to sit tight and let things take their course.
Step 24 – Speak with Spider in the Ether Tank

Say goodbye to Drifter then return to Spider to finish up week three of Sails of the Shipstealer. Once again, Spider will play an Engram roulette with you – and, once again, he’ll cheat you and award you a green piece of armor.
Like previous weeks, Eido will then crackle over your radio to tell you that she detected some energy interference. She also pointed out that she’s got enough data to devise a way to block these energy spikes. It’s clear that Spider is hiding something – whether it be cheating us with the Engrams, or something more sinister. Either way, we’ll find out what it is next week.
Step 25 – Check in with Spider

As always, you’re going to be told to check in with Spider even though you just spoke with him. You’re more than likely going to complete this quest step automatically, so don’t pay it any mind. On the off chance you don’t, pop back over to the Ether Tank to say hello.
After that, head to the H.E.L.M. to place this week’s artifact and you can call it a day!
Sails of the Shipstealer Week 4
Step 27 – Pop in For a Chat with Eido at the Star Chart

Week for of Destiny 2‘s Sails of the Shipstealer starts off with a lovely little chat with Eido at the Star Chart. She’s easily the best thing about all of Season of Plunder, and it’s not even close – and this has been a really fun season so far.
She’s going to give us a little more detail regarding the row she had with Daddy Mithrax at the end of last week. In the time between now and then, the two of them had a heart to heart and came to an agreement. Eido is going to continue helping us in our search for the Fallen artifacts, and I couldn’t be more excitied. The more Eido we get – the happier I’ll be.
Step 28 – Loot a Hidden Buried Chest at the End of an Expedition

Once you’re done catching up with Eido, it’s time to get into the gameplay loop proper. As per usual, things are starting off with an Expedition buried treasure. If you don’t have a treasure map active in your Captain’s Atlas, slot one in before you do the activity. Otherwise, you won’t be able to loot the treasure at the end of the mission.
If you don’t have the materials you need to slot a treasure map into your Captain’s Atlas – then you might want to run a Ketchcrash or two before you crack on with Sails of the Shipstealer.
We’re done introducing new bosses to Ketchcrash and new locations to Expeditions at this point in the season. The only new stuff to look forward to should be the Pirate Hideouts and perhaps a mission towards the end of the season. For now, though, it’s buisness of usual.
For Sails of the Shipstealer step 28, you need to loot a buried treasure from any location – so that’s fine. You also have to kill enemies on Europa, though. If you get an Expedition on Europa then all’s well. If not, you might want to head to Europa yourself to finish off this quest step.
Step 29 – Complete Pirate Hideout: The Beast Tamer

After digging up your buried treasure, it’s time for this weeks Pirate Hideout. Pirate Hideout: The Beast Tamer is, in my opinion, the best hideout we’ve gotten so far. When you first enter, the Eliksni pirate crew you’re meant to be fighting will have already been slaughtered.
There are bodies strewn everywhere – whoever was here before us operated with a leathal effecincy that rivals our own. We don’t know who’s resposnsible yet, but this mystery is going to be a key plot point going forward in Season of Plunder.
Navigate your way through the hideout. Again, all the regular enemies up to the boss are dead so just focus on finding your way around this maze of a base.
You’ll find the boss in his treasure room along with a bunch of ADs and three yellow-bar Warbeasts. The boss will currently have a shield up – that shield will stay up until you kill all three dogs. Once they’re dead, the shield will drop and you can do DPS.
After depleting one third of the boss’ health, his shield will reactivate and he’ll spawn in three more dogs. Again, kill them, do damage, and rinse and repeat a final time to finish off Pirate Hideout: The Beast Tamer.
Grab the relic – which the party here before us left for some reason, then head back to the Eliksni Quarter to finish out week four of Sails of the Shipstealer.
Step 30 – Return to the Holoprojector in the Eliksni Quarter

We’re going to be meeting up with Mithrax next, so head to the Eliksni Quarter Holoprojector. He’ll call you and ask for your patience. He seems uncharacteristically unnerved at the fact that there’s a third party looking for the relics. He’s promising to come clean, but he needs more time – so I guesss we’re going to sit on our hands for now. Is it Nezarec? Probably, but it’s anyone’s guess as of week four.
Step 31 – Visit Spider in the Ether Tank

After finishing up with Mithrax, head into the Ether Tank to play Spider’s Engram roulette game. Unlike previous weeks, this week we’ll actually get our red-border weapon! Much to the Spider’s surprise and irritation.
After claiming your Engram, you’ll get another message from Eido over the radio regarding her energy suppression device. Spider has clearly been playing us, so hopefully we get some payback in the next few weeks now that Eido has fixed the game (or unfixed it) in our favor.
Step 32 – Check in With Spider
As per usual, the final step of this week is to check in with Spider – which you should already be doing when this quest step pops. If not, go and interact with him. After that, it’s just a matter of putting the relic with the others in the H.E.L.M. and calling it a week!
Sails of the Shipstealer Week 5
Step 34 – Speak with Mithraxs in the H.E.L.M.

Week five of Sails of the Shipstealer starts off very exciting indeed. The first thing we need to do is head back to the Star Chart in the H.E.L.M. to take a call from Mithrax. He’ll inform us that Eido has reached out to Eramis through some old Eliksni customs to organize what amounts to their version of a parley.
Needless to say, Mithrax isn’t thrilled about Eido’s naivety here and believes that Eramis cannot be trusted. However, Eramis is nothing if not a pure-blooded Eliksni, so if anything, it’s Mithrax here whose loyalty is in question.
Whatever the case may be, this parley is bound to be insightful – and we don’t have long to wait to see it.
Step 35 – Complete Expedition and Kill a BUNCH of Champions

Step 35 of Sails of the Shipstealer is just like every other week. It requires us to dig up the buried treasure at the end of an Expedition – meaning you’ll need a treasure map in your Captain’s Atlas. Without one, you’ll have to do some Ketchcrash.
Also as with other weeks, we have an additional objective to complete on top of that requirement. In past weeks, this has been something easy like killing Cabal. This week, it’s to kill Champions out of 50. Yeah. I have no idea what Bungie was thinking when it decided this was a good seasonal quest objective.
Now, there are some caveats. Champions aren’t just worth one point. From my experience, each Champion you kill is worth around three points, but that still requires a ludicrous number of Champions killed for this quest step.
However, Champions in Master Ketchcrash count for more. A lot more. One run of Master Ketchcrash is enough to fully complete this objective. Master Ketchcrash is easy, so don’t be scared away by the power level requirement. As long as you’re above 1580, you’ll be fine – just get yourself into an LFG and find a group running Master Ketchcrash (there are a lot of them).
If you’re not big on Destiny‘s social scene, then I’m afraid you’re going to have to grind this out the hard way. Legendary Lost sectors are your best bet for finishing this fast if you’re not willing to seek out a group for Master Ketchcrash.
Update: Bungie has autocompleted this part of Sails of the Shipstealer for all Destiny 2 players, so don’t worry about the Champions.
Step 36 – Complete Pirate Hideout: Arask, The Bully

After spending an unreasonable amount of time completing step 35, all that really remains is to complete this week’s Pirate Hideout – The Bully.
This is possibly the easiest one yet. The Bully is just…. a dude. He has a health gate based on ADs, but there’s absolutely nothing special or interesting here like there was in previous weeks.
Just go through the level and kill him. It shouldn’t take you any longer than five minutes.
Step 37 – Witness the Parley Between Eramis, Eido, and Mithrax

After finishing Pirate Hideout – The Bully and picking up this week’s relic – the mission will autocomplete and you’ll be teleported to a landing pad on an asteroid outside. Mithrax and Eido will be waiting for you.
Shortly into their conversation, Eramis will appear in the flesh for the first time since Beyond Light. Compared to previous seasonal villains, she actually seems rather reasonable and is at least non-hostile towards Eido.
Eido informs Eramis of the third party seeking out the relics – which is seems Eramis knew nothing about. However, she turns down our offer of teaming up to fight them off and lays a bombshell at our feet in the form of a cutscene.
This cutscene does a lot. It finally unveils Mithrax’s past to us, and more importantly, tells us exactly what – or who, is inside the relics we’ve been collecting every week. I won’t go into spoiler territory here, just make sure you don’t skip it, even if you don’t care for Destiny‘s story.
Step 38 – Speak with Eido at the Projector in the Eliksni Quarter

After processing the revelations from the last step, you’ve to head to the Eliksni Quarter from the H.E.L.M. to have a chat with Eido. Needless to say, she’s got a lot to think about regarding her father. Again, no spoilers, but he’s not exactly in her good books – to say the least.
Still, ever the professional, Eido affirms that her personal feelings will not stand in the way of our mission and that she’s still committed. We’ll have to see if that resolve stands the test of time over the coming weeks, though.
Step 39 – Check in with Spider in the Ether Tank

Finally, it’s back to Spider for some Engram roulette. Just like last week, Eido will block Spider’s signal cheater and he won’t be happy. We’ll win a red-border sidearm, to which Spider will tell us “no more funny business,” ironic when we’re just countering his cheating measures.
It’s also awfully brave for an Eliksni with a bounty on his head to be so recklessly arrogant and aggressive with us – especially when it’s Queen Mara who put that bounty there in the first place. Personally, I don’t see him surviving past Lightfall, but I guess we’ll have to wait and see.
Step 40 – Finish up with Spider

If you haven’t read all of Spider’s dialogue for this week, do that now and week five of Sails of the Shipstealer will be done. You can head back to the H.E.L.M. to place the relic, then relax until next Tuesday arrives.
Sails of the Shipstealer Week 6
Step 42 – Visit the Star Chart in the H.E.L.M.

We’re getting towards the end of Sails of the Shipstealer – and I’m not too sure where the story is going from here. Things are all up in the air, but if there’s something we can count on right now, it’s Drifter.
Speaking of, step 42 requires us to head to the Star Chart to have a chat with Drifter over the Holoprojector. He’ll confirm that he did, in fact, visit one of the Tombs of Nezarec, so he clearly knows more than he’s been letting on about this whole topic. Unlike Mithrax, though, it’s caution rather than shame that seems to have influenced him to bite his tongue this long.
Either way, the cat’s out of the bag now. He’ll have some interesting stuff to say, so have your chat, grab your bounties, and head on your merry way.
Step 43 – Loot an Expedition Buried Treasure and Complete Ketchcrash

Bungie is confusing me something fierce right now. Last week, it asked us to kill Champions, with Master Ketchcrash awarding more points towards the objective. This week, we need to complete five total Ketchcrashes, with Master again rewarding more points. In fact, one Master Ketchcrash is enough to complete this objective. So, clearly, Bungie wants people playing Master Ketchcrash – so why does it not have matchmaking?
Unless you use LFG to get a team for a Master run, you’re going to have to slog through several regular runs of the activity before you can move on with Sails of the Shipstealer.
Once you’ve dealt with the Ketchcrash situation, though, all you need to do is go loot a buried treasure in Expedition. So, go about completing these objectives in whatever way you see fit.
Step 44 – Complete Pirate Hideout: The Coward

This week’s Pirate Hideout is The Coward. This Pirate Hideout is significant because we finally see what third party has been involved in the search for Nezarec’s Relics. As it turns out – it’s the Lucent Hive still under the command of Immaru.
When you arrive at this Pirate Hideout, the Fallen will be getting their world rocked by the Hive – come in and even the playing field by wiping both sides out. Proceed through the mission and you’ll eventually reach the boss arena.
Rather than facing the Fallen boss you were meant to, you’ll be fighting a Hive Guardian. This fight is simple – the boss has three health segments. After you deplete each segment, they shield up and spawn a handful of ADs. Kill the ADs, and the shield will drop. Rinse and repeat until they’re dead, then collect the relic and be on your way.
Step 45 – Witness the Conversation in the Eliksni Quarter

The next step of Sails of the Shipstealer requires you to head to the Eliksni Quarter from the H.EL.M. Once there, you’ll need to witness a conversation between Drifter and Eido face-to-face.
Any time these two characters interact – it’s great, and this is no exception. They have a lengthy and heartfelt conversation, during which Eido actually calls Drifter by his “name”.
We don’t get much story development here, but it is nice to get some insight into how Eido feels towards Mithrax following his big revelation.
Step 46 – Visit the Holoprojector in the Eliksni Quarter

Once you’ve watched Eido and Drifter’s conversation, turn around and head towards the Holoprojector outside of the Ether Tank. Interact with it and we’ll hear from Mithrax for the first time this week.
He offers no apologies for keeping his past a secret – as he believes it was his right. He does, however, express regret. His relationship with Eido has been damaged, and he blames himself for that.
Again, we don’t get much in the way of story here. But it is more insight into where his head is at right now.
Step 47 – Visit Spider in the Ether Tank

Ah yes, it’s everyone’s favorite time of the week! Head into Spider in the Ether Tank to play this week’s game of Engram Roulette. Just like last week, we’ll win and be awarded a red border before Eido crackles over our radio.
Unlike weeks gone, though, Spider seems remarkably pissed – in a foreboding, foreshadowing way. He invited us back to play again next week in a rather sinister tone – so is he going to betray us in some meaningful way? I mean, probably, but over a game of roulette?
Things with Spider are ominous, either way, so we’ll have to see how that develops towards the end of Sails of the Shipstealer.
Step 48 – Check in With Spider

I’m a broken record at this point – but once you play Engram roulette with Spider, you need to click through his dialogue box. If you don’t, then this Sails of the Shipstealer quest step won’t update. If you’re one of the 99.9% of players that do click through on instinct, you’ll never even notice this quest step exists – so don’t worry about it.
Sails of the Shipstealer Week 7
Step 50 – Speak with Drifter in the H.E.L.M.

Week 7 – not long left to go now. I don’t know about you, but it’s around weeks six and seven when I start to feel serious burnout from Destiny 2’s repetitive weekly seasonal objectives. All the same, they need to be done – so do them we will.
First things first, we’re back to the Star Chart for a chat with one of this season’s cast of characters. This time around, we’re having a talk with Drifter. He won’t really say anything noteworthy, but he does give us some ominous warnings regarding collecting the pieces of Nezarec, who we now know is 100% a dead Disciple of the Witness.
Take what Drifter says to heart – or don’t. Nezarec will almost definitely be back as an ally or enemy in some capacity, regardless.
Step 51 – Loot a Buried Treasure and Get Kills with Season of Plunder Weapons

You all already know how this is going to go by now. Your first gameplay objective of week seven of Sails of the Shipstealer is to loot the buried treasure at the end of an Expedition. Once again, load up a map into your Captain’s Atlas and head on your way.
It seems Bungie finally realized how ridiculous its seasonal quest objectives have been recently. Rather than something ludicrous like completing a Master Ketchcrash, five regular Ketchcrashes, or killing a bunch of Champions, all you have to do this week is kill enemies with Season of Plunder weapons.
This objective is marked out of 100, with enemies killed inside Expeditions and Ketchcrash counting for more points. I was able to get this whole thing done by using a seasonal weapon exclusively during my weekly Expedition, so there should be no complications here.
Step 52 – Complete Pirate Hideout: Ithyks, the Scrapworker

I’m not going to lie, at this point – Pirate Hideouts like this feel insulting. The idea behind this one is that Ithyks, the boss, is a trickster. They’re going to use traps and subterfuge to take us down. Unfortunately, this amounts to the same mechanic we’ve faced every other week in these Hideout missions.
At the start of the mission, you’ll notice some pretty obvious lasers. Stand back and shoot them – like you’ve done a million times before this point.
The first section of this Pirate Hideout involves you collecting three Bypass Codes. These codes are dropped by yellow-bar Super Shanks that spawn in a small room at the start of the activity. These spawn in waves along with a handful of regular, Explosive, and Tracer Shanks. There’s nothing to this – just kill things and don’t get blown up.
Once you reach Ithyks, they’re going to have the same health-gating mechanic as the other pirate bosses – only this time, she’s going to go behind actual barriers each time you get her health down by one-third. How exciting!
Sarcasm aside, each segment of the boss’ health bar you deplete will have them flee and spawn in some more Shanks, along with another Super Shank carrying a Bypass Code. Kill the Shank, use the code on the console next to whatever barrier the boss is behind, do damage. Rinse and repeat that process twice and you’re done.
Step 53 – Check in with Spider in the H.E.L.M.

Once you’ve finished up this week’s Pirate Hideout, you’re done in terms of actual gameplay. All that’s left to do is head back to the Eliksni Quarter in the H.E.L.M. to speak with Spider.
Initially, he’s going to give you a thinly-veiled threat in the form of an anecdote. Spider is clearly getting too big for his boots here. I expect our relationship with him to come to a nasty conclusion soon – potentially next week or next season.
Listen to what he has to say, or don’t, and you can play a game of Engram roulette.
Step 54 – Check in with Spider in the H.E.L.M… Again

Sails of the Shipstealer steps 53, 54, and 55 are all the same thing – speak with Spider in the H.E.L.M. I don’t know why Bungie loves this objective so much, but that’s the way that things have been laid out.
Once you speak with Spider the first time and get his little story, just click through his dialogue to finish up with this week’s quest steps.
One little thing worth mentioning here is the fact that Spider is remarkably calm with regards to us cheating him out of… cheating us in Engram roulette. Eido will report that there were no energy spikes this week, again building to Spider making a potential move on us.
My money’s on him trying to potentially attack Eido, perhaps, and Mithrax taking him out. That’s pure speculation, though. We’ll just have to wait and see what actually happens.
Step 55 – Check in with Spider in the H.E.L.M… Again… Again

Yes, this objective again. I’m flogging a dead horse at this point – so just finish up your conversation with Spider and head off to do whatever it is you do in between weekly seasonal quest updates.
Sails of the Shipstealer Week 8
Step 57 – Return to the Star Chart in the H.E.L.M

Okay, last week of Sails of the Shipstealer! The big season finale! I’m sure you’re all just as excited as me to see where this season ends up – so let’s jump straight into it.
Your first objective will be returning to the Star Chart in the H.E.L.M, as per usual. There, you’ll be met by Mithrax who’s gone all-concerned dad mode on Eido. Apparently, Eido has started cutting him out, and Mithrax doesn’t know how to deal with this angsty phase his daughter is going through.
He’ll also inform us that Eramis has gone radio silent recently, with the exception of a transmission she sent to Eido. We don’t know why she’s cut communications all of a sudden, but it’s pretty ominous nonetheless.
Finish up your chat with Mithrax, grab your bounties, and get ready to crack through the last week of repetitive questing! At least, the last one for a little while.
Step 58 – Complete an Expedition and… Emote with Teammates…

Yeah, this is an odd one. For step 58 of Sails of the Shipstealer, you’ll need to loot a buried treasure at the end of an Expedition, as per usual. Your second objective, though, requires you to celebrate with three teammates by emoting at the end of either Ketchcrash or Expedition. It’s unusual but far better than killing a bunch of Champions, I guess.
I got this step of the quest done in my Expedition when both my teammates emoted at the end of the mission. However, I’ve heard reports that the counter actually goes up based on your emoting, not your teammates. I emoted several times during the end of that Expedition, so it’s possible – make sure you do three different emotes when you finish your activity just to be on the safe side.
If this portion of the quest doesn’t complete for you after that, you’ll need to run another Expedition/Ketchcrash, or two.
Step 59 – Complete Pirate Hideout: The Lucent Brood

Finally – the last Pirate Hideout. Unfortunately, it looks like the super dangerous force that ambushed the pirates a few weeks back truly is just the Lucent Hive. I was expecting some sort of super-enemy to be introduced, but I guess not.
This Pirate Hideout is the conclusion of the entire seasonal story. We’re going to be raiding the Lucent Brood this time, rather than the Eliksni pirates. Despite that, the hideout plays out the exact same – including the same mechanics for the boss fight.
First things first – when you get into the hideout, you’ll have to clear out some ADs along with a Hive Guardian Wizard. Following that, you’ll end up in the boss fight. There’s a story running throughout this Pirate Hideout that you listen to via transmissions – but I’ll avoid commenting on that for spoiler’s sake.
The boss fight is as boring and repetitive as ever. There’s a boss – in this case, a Hive Guardian. That boss’ health bar is in three segments. Take down a segment, and they’ll get a shield. That shield will disappear after they move around the room, and more ADs will spawn.
Yeah.
I can cut Bungie a lot of slack when it comes to seasonal content, but this is just lazy at this point. It’s the last boss fight of the entire season and we just get… more of the same? Maybe I expect too much, but this just sucked.
This Pirate Hideout sucked so much for me that it actually soured the cutscene at the end of it. Despite that, having a cutscene is always nice, especially when it’s dealing with Mithrax and Eido.
Step 60 – Visit the Holoprojector in the Eliksni Quarter

Finish up with the Pirate Hideout and you’ll be sent to the Holoprojector in the Eliksni Quarter.
Here, you’ll get one last chat with Drifter where he tells you that Eido and Mithrax have the relics in their care (even though they’re visually still in the H.E.L.M.). He’ll then go on to congratulate you on your good work and advise you to take a well-earned break.
More interestingly is the fact that he forgoes his cut of the loot from Spider. He explains that it feels nice to be a good guy for once – which is the kind of Drifter character development I can get behind.
Step 61 – Visit Spider in the Ether Tank

Now, up until this point in the season, I was of the belief that Spider was going to turn on us. Bungie certainly made it seem like that was going to happen. So, when the last two steps of the seasonal quest required us to speak to him – I was very excited.
Unfortunately, all of that teasing seems to have gone down the drain. Spider tells you that he’s learned to always bet on the Guardians and doesn’t even try to rig the game. I don’t know about you, but that is the most underwhelming way I could have anticipated this season ending – with nothing happening. Maybe we’ll get another quest to conclude everything before the start of the next season, but that’s effectively a 50/50.
Regardless of how you feel about this conclusion, grab your red border and finish up chatting with Spider.
Step 62 – Check in with Spider
Yes, even the last week of Sails of the Shipstealer isn’t safe from this. If you didn’t click through Spider’s dialogue, go back and do so now. If you did, then you’re done Sails of the Shipstealer! Congratulations.
Personally, I think this was one of the weakest seasons in a very long time. It felt like a filler episode that ultimately led nowhere, granted I’m sure Nezarec will play a big part in the story going forward.
That’s just my opinion, though, and my opinion doesn’t matter. You’ve seen the seasonal quest to the end, and that’s worth celebrating and enjoying.