Minecraft Legends is now out on PC through Steam and Xbox Game Pass. It’s a great time to be a Minecraft fan because Legends aims to offer a different experience in the same universe with its blend of action and strategy. The PC version runs fine enough for the most part, but players can run into a few technical issues. If you’re running into the Minecraft Legends crash at launch issue, here are a few recommendations to fix that.
Verify Game Files
As always, you first want to make sure the game files are in working order. At times, during the download or installation process, something can go wrong, leading to tons of crashing and general stability issues. Thankfully, most PC clients allow you to scan and verify the files and redownload anything missing or broken.
Steam
- Open Steam and navigate to your library
- Right-click on Minecraft Legends in your library
- Click Properties
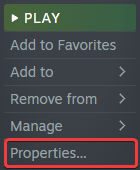
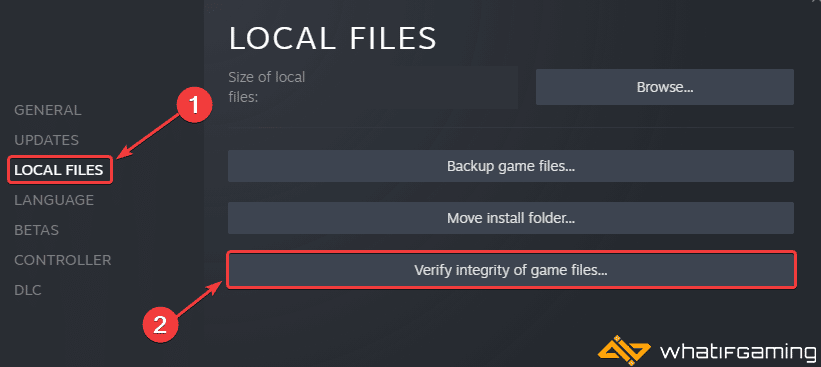
- Select the LOCAL FILES tab
- Click on Verify Integrity of local files…
Xbox App for PC
- Launch the Xbox App
- On the left, under INSTALLED, click on Minecraft Legends

- Click on the button with three dots
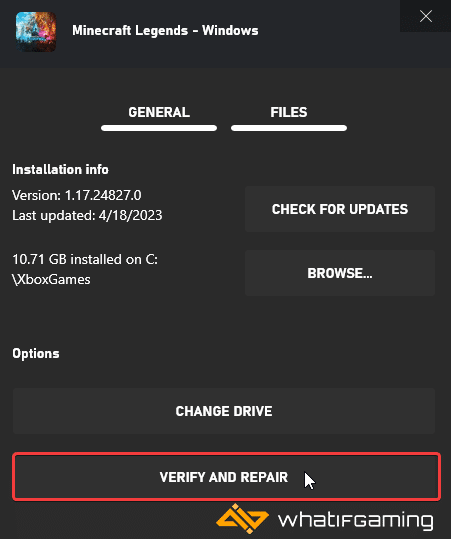
- Select Manage

- Select the FILES tab, and then click on VERIFY AND REPAIR under Options
This will initiate a scan and check your game files to spot any issues. This will likely fix the Minecraft Legends crash at launch issue for most users.
Manually Update Your GPU Drivers
Make sure that you have the latest drivers for your GPU installed. You can get the latest ones from the links below.

Update Your Windows
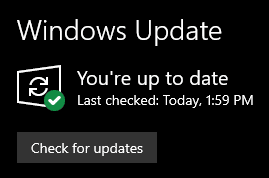
It’s recommended to update your Windows to the latest version to ensure you aren’t missing out on any important updates to the OS.
- In Windows Search, type “Update” and click on Check for Updates
- This will take you to the Windows Update section, and you can make sure you are on the latest version
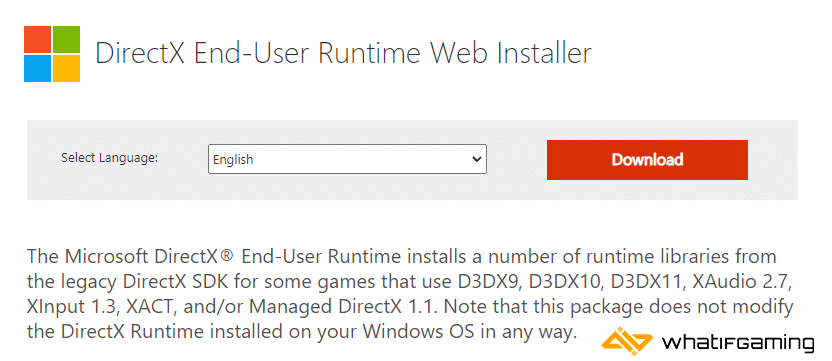
Update DirectX and Visual C++ Redistributables
Ensure that both DirectX and Visual C++ Redistributables are on the latest version.
Switch to Dedicated GPU (Laptop Users)
Ensure that your dedicated GPU is being utilized instead of the integrated one.
Switching to the dedicated Nvidia GPU
- First, open the Nvidia Control Panel
- Then navigate to 3D Settings and then Manage 3D Settings
- Open the tab Program Settings and choose Minecraft Legends from the dropdown menu
- Next, select the preferred graphics processor for this program from the second dropdown.
- Your Nvidia GPU should show as High-performance Nvidia processor
- Save the changes
Switching to the dedicated AMD GPU
- First, open Radeon Settings
- Then navigate to Preferences, followed by Additional Settings
- Here, select Power and then Switchable Graphics Application Settings
- Select Minecraft Legends from the list of applications
- If Minecraft Legends isn’t in the list, click the Add Application button and select the executable from the installation directory. This adds the game to the list, and you’ll be able to select it afterward.
- In Graphics Settings, assign the High-Performance profile to the game.
Update Minecraft Legends
Steam
- Open Steam and navigate to your library.
- Right-click on Minecraft Legends in your library
- Click Properties
- Select the Updates tab, and set Automatic Updates to High Priority

Xbox App for PC
- Launch the Xbox App
- On the left, under INSTALLED, click on Minecraft Legends
- Click on the button with three dots
- Select Manage
- Select the FILES tab, and then click on CHECK FOR UPDATES

Add an Exception to Your Anti-Virus
Third-party anti-virus software can often flag some games as a threat, so it’s recommended that you add Minecraft Legends to its exceptions list.
We have listed some popular ones and their respective FAQ pages.
- Windows Defender
- Microsoft Security Essentials
- Malwarebytes
- Avast Antivirus
- AVG Antivirus
- Kaspersky Anti-Virus
- Webroot SecureAnywhere
- McAfee Antivirus (Steam Support guide)
- Bitdefender
We hope this guide helped fix the Minecraft Legends Crash at launch issue. Let us know if you have any questions in the comments below.