The Pressurized Refit in Destiny 2 is a reward for completing Should You Choose to Accept it Part 2. Needless to say, this follows from Part 1, which rewarded the Frenzy Refit. So, if you haven’t done that – do it now.
For the rest of you that have got that prerequisite completed, I’ll be going over Should You Choose to Accept it Part 2 in detail. The Pressurized Refit isn’t that great – I would argue that the Frenzy Refit is better. However, you’ll need to have this quest completed in order to access parts three and four when they go live in Destiny 2, so you have to do it either way.
Destiny 2 Pressurized Refit – How to Complete Should You Choose to Accept it Part 2
Step 1 – Complete Operation: Diocles

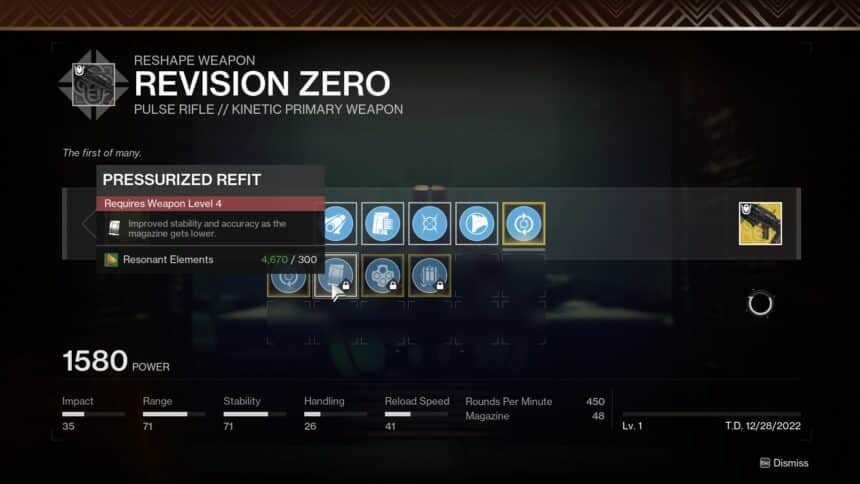
Should You Choose to Accept it Part 2 is the second installment in the Revision Zero weekly quest. Last week, we got our hands on the Frenzy Refit. This week, it’s the Pressurized Refit up for grabs. The Pressurized Refit is going to increase Revision Zero’s stability and accuracy as its magazine gets lower. That’s not as good as the Frenzy Refit, but there’s still no reason not to get it.
Starting off the quest, you’ll need to complete Operation: Diocles from the H.E.L.M. This is practically the same as every other mission of this type you’ve done – just with some different platforming.
Just jump into the mission and make your way through it – it’s not particularly difficult and shouldn’t take you longer than 15 or so minutes.
Step 2 – Travel to the Moon

Just like last week, you’ll be told to go to a planet after completing your Operation. This time around, you’re being sent to the Moon. Load up the planet’s Landing Zone and your quest objective will update to step three.
Step 3 – Complete Patrols and Kill Targets on the Moon

Once again, you’re going to have to defeat combatants and complete patrols on this planet to decrypt a cipher.
This time, though, I managed to get some numbers for you:
- Killing an enemy – 1%.
- Completing a patrol – 10%.
Those were the figures I was getting with Should You Choose to Accept it Part 2. They may not be 100% accurate, but they should be close enough.
I would recommend you hop into a Public Event to get this done. You’ll get plenty of enemies to kill – at least enough to get you almost to step 4.
Step 4 – Finish the K1 Logistics Lost Sector

Should You Choose to Accept it is clearly following a formula week-to-week, starting with an Operation mission and progressing onto decrypting a cipher in a Lost Sector.
K1 Logistics is on the plate for Part 2, with the decryption node sitting just at the exit behind the final chest.
This Lost Sector is nothing to worry about at all. You can do it straight from the Patrol Zone – there’s no need to do it on Legend or Master.
The K1 Logistics Lost Sector is the one up the top of Archer’s Line on the Destinations map. It’s not too difficult to find – just stick to the outside of the building.
Step 5 – Find the Schematic During Operation: Seraph’s Shield on Legend

Okay, we’ve been spoiled with easy stuff up until this point. Now, it’s time to get serious.
Just like last week, we’re going to be completing a run of Operation: Seraph’s Shield on Legend. I suggested doing this in a Fireteam in Part 1, but it turns out that this mission is a little bit broken if you do that.
You see, it just so happens that the enemy’s health scaling with additional Fireteam members is off. The more people you do this mission with, the harder enemies are to kill – and the increase isn’t exactly proportional.
So, it’s actually optimal to do this one solo, especially since you have access to Solo Operative and Weakened Clear during Season of the Seraph.
During your Legend run of the mission, you’ll need to keep an eye out for a dead Exo carrying the schematics you’re looking for. Last week, this Exo was in the microwave room. This week, it’s in the vents just past where you first fight the Hive.
You’ll get a marker on your screen once you’re close to it – so it should be impossible to miss. Just remember that it’s in the room after where the Hive first appears and you should be alright.
Step 6 – Finish Operation: Seraph’s Shield on Legend

Once you’ve secured Destiny 2‘s Pressurized Refit schematic from the dead Exo, you can go ahead and finish Operation: Seraph’s Shield on Legend to close out Should You Choose to Accept it Part 2.
This isn’t easy, but there’s no difference between what you’re doing here, and what you did last week. What I will say, though, is that Grand Overture isn’t the best against the final boss – I would replace it with Retrofit Escapade, a Linear, or maybe Parasite after the Brig section.
Beyond that, Void is king for all classes, especially if you’re playing solo. Either way, though, get through it and you’ll get your Pressurized Refit.
After that, you’re done with Should You Choose to Accept it Part 2. Now, you can head back to Mars and slap that thing in your Revision Zero, although I don’t understand why you would ever replace the Frenzy Refit with it. You do you, though.